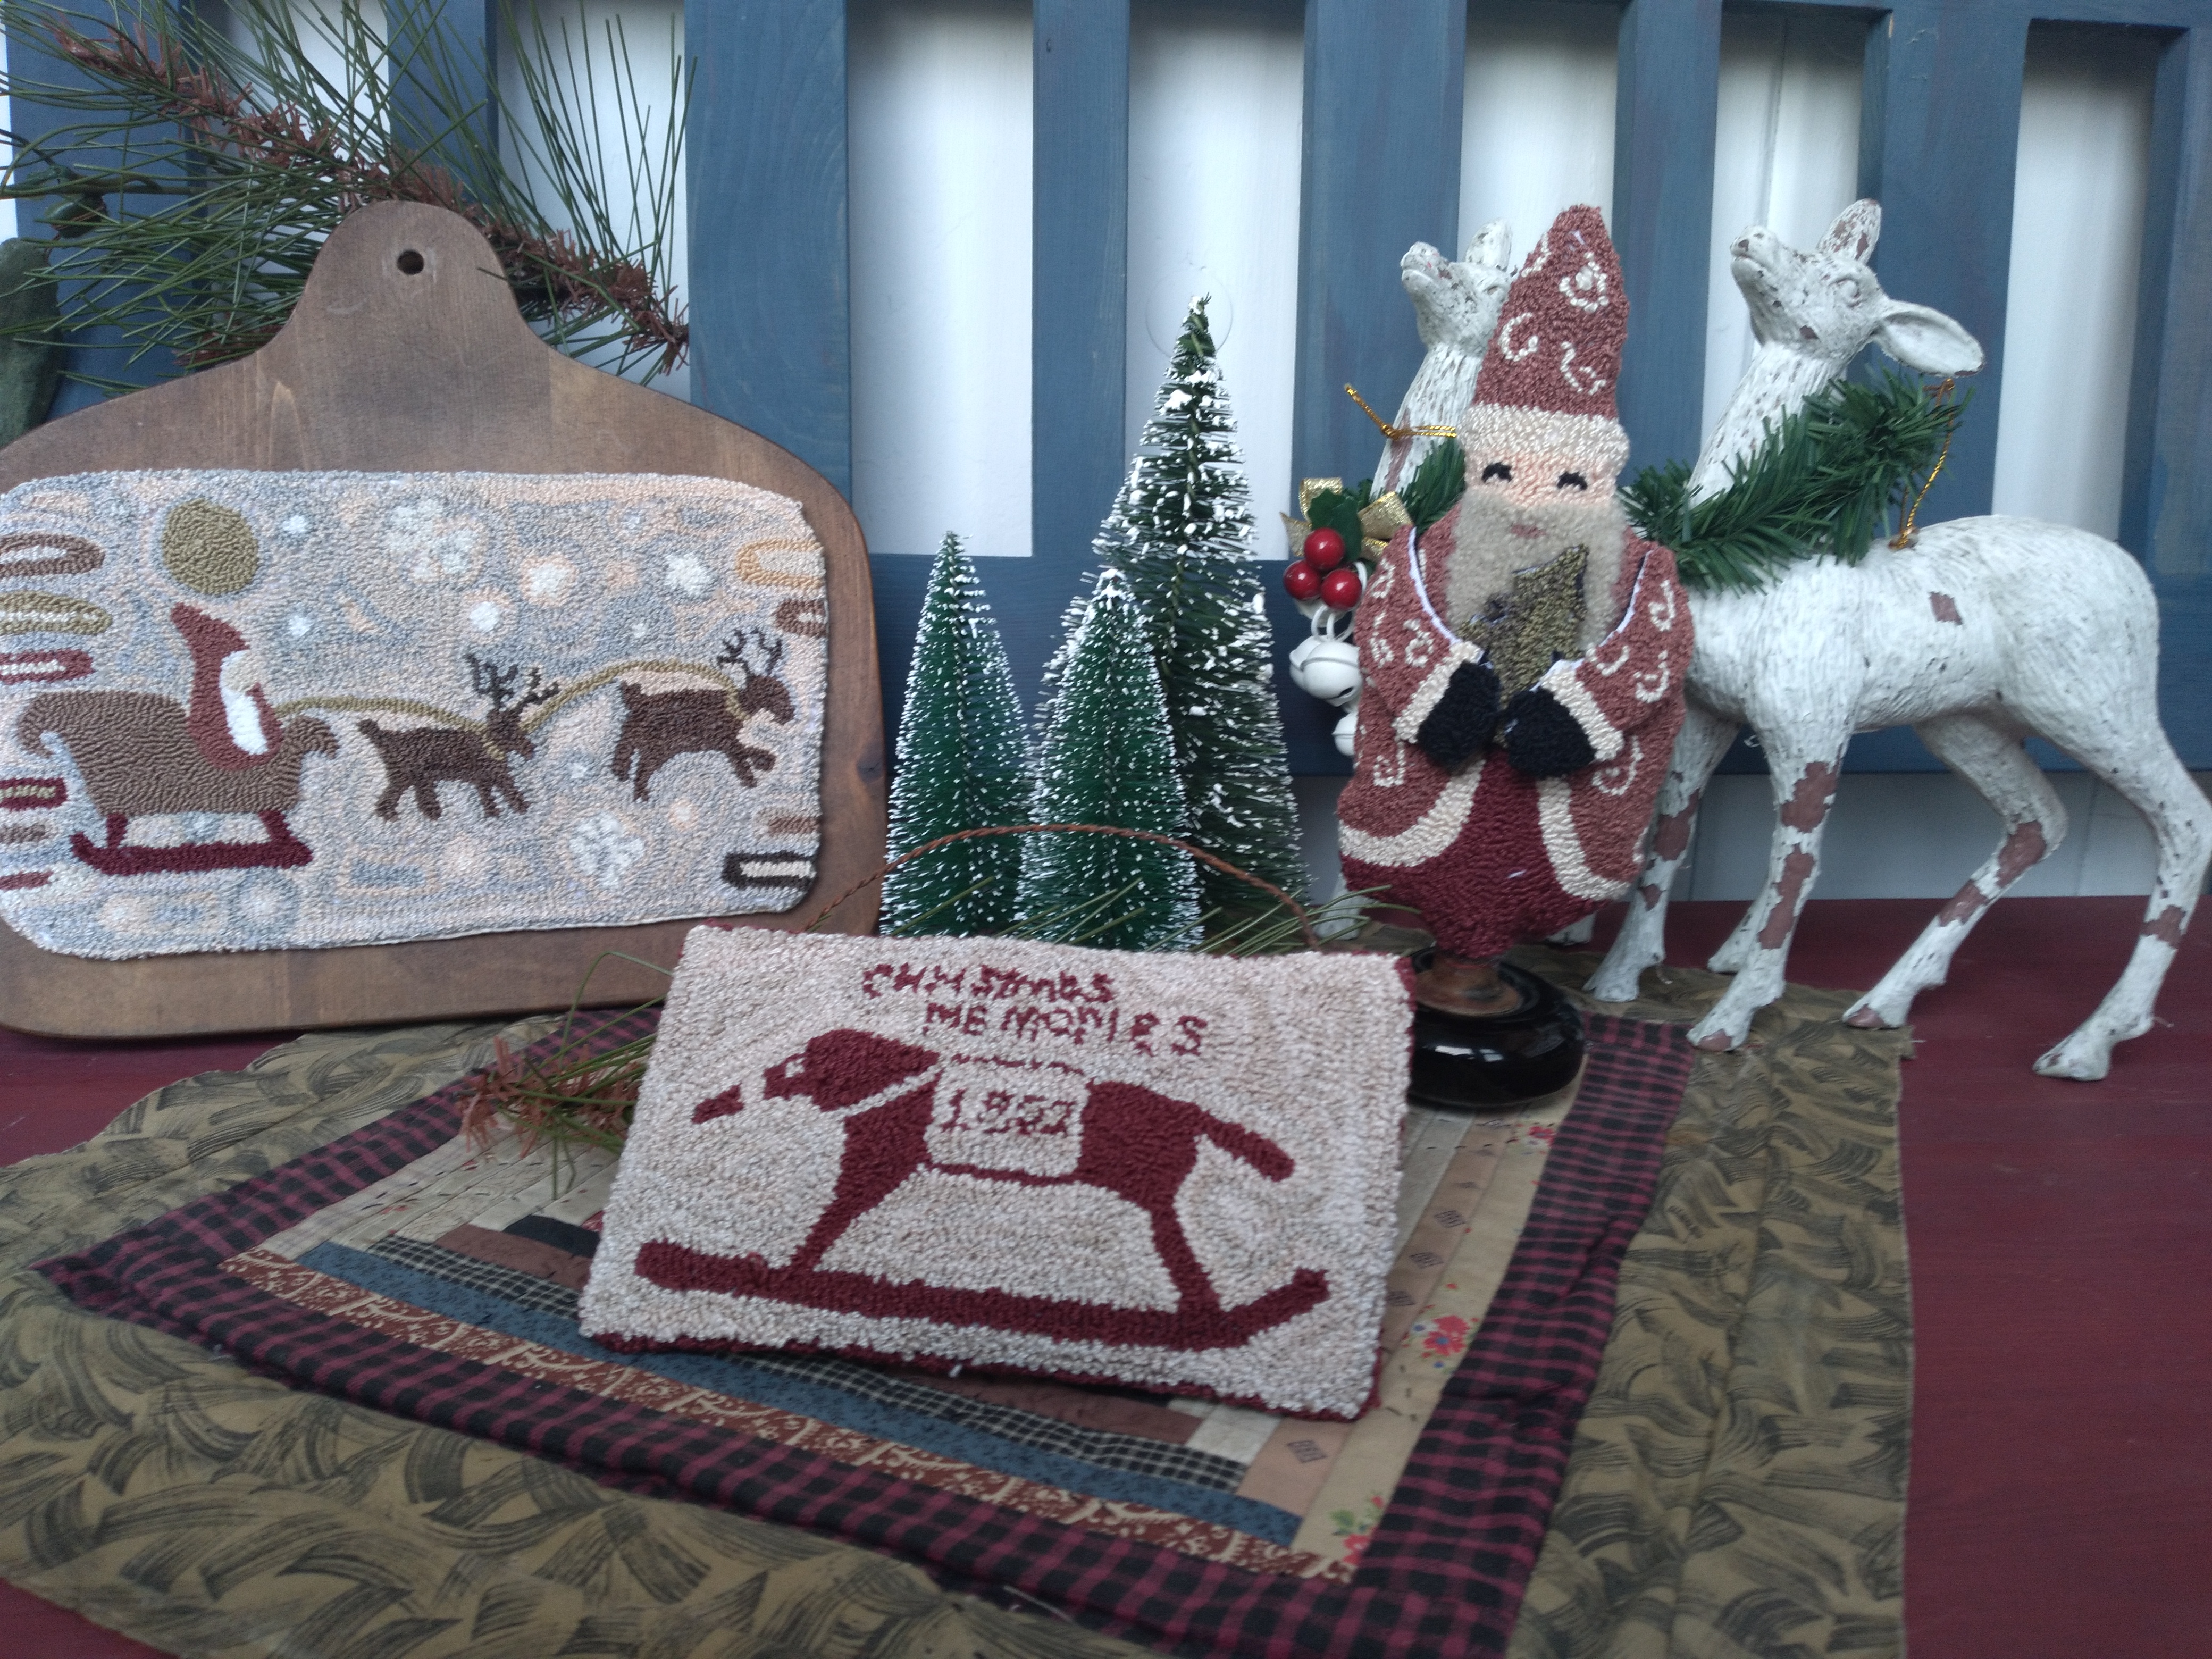
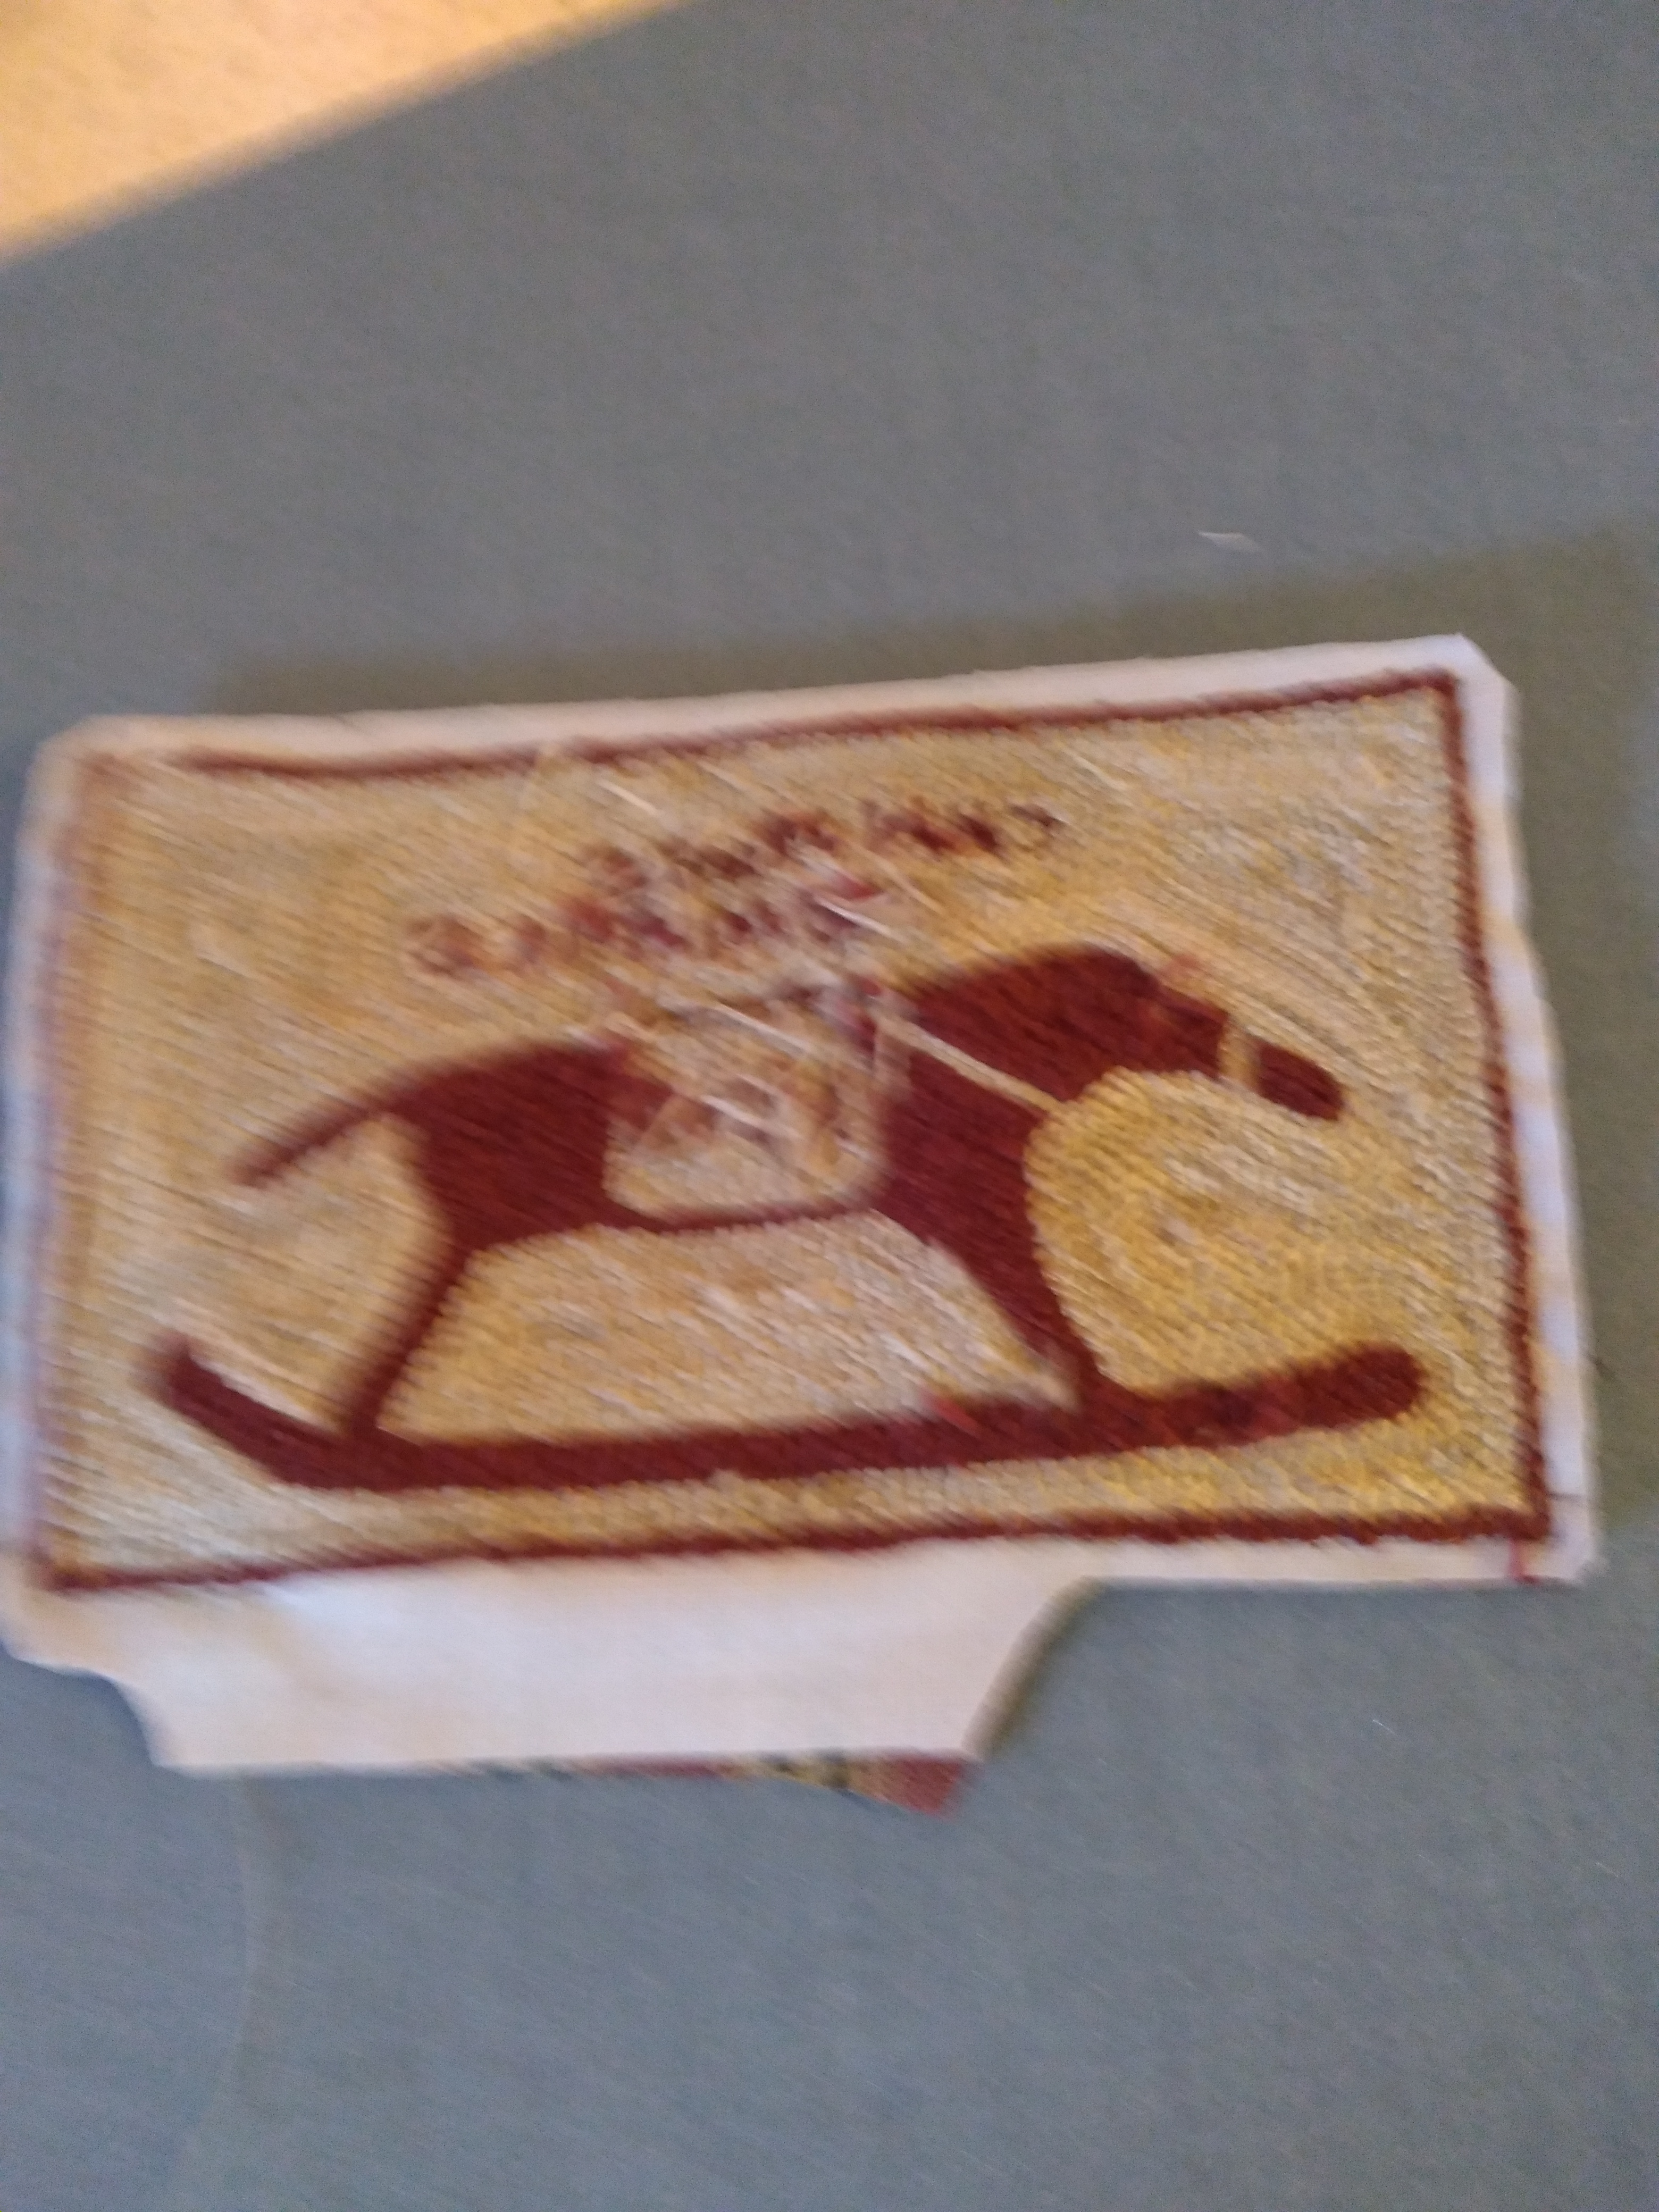
I’m happy to have some finishes to show today. I was overwhelmed by the number of responses to my query on a black knob or a white one for Father Christmas’s base. Here is the decision, in picture. Included are two patterns from Robin Leuschen. All three pieces have been punched mostly with Valdani pearl cotton. I love the depth and texture you get from the varigated colors. The background for the Santa and sleigh is M1001 and it’s called Vanilla Sky. I used my rusty wire to make a hanger for the rocking horse. I found the two reindeer at the flea market. As you can see I’m a fan of old tattered things.
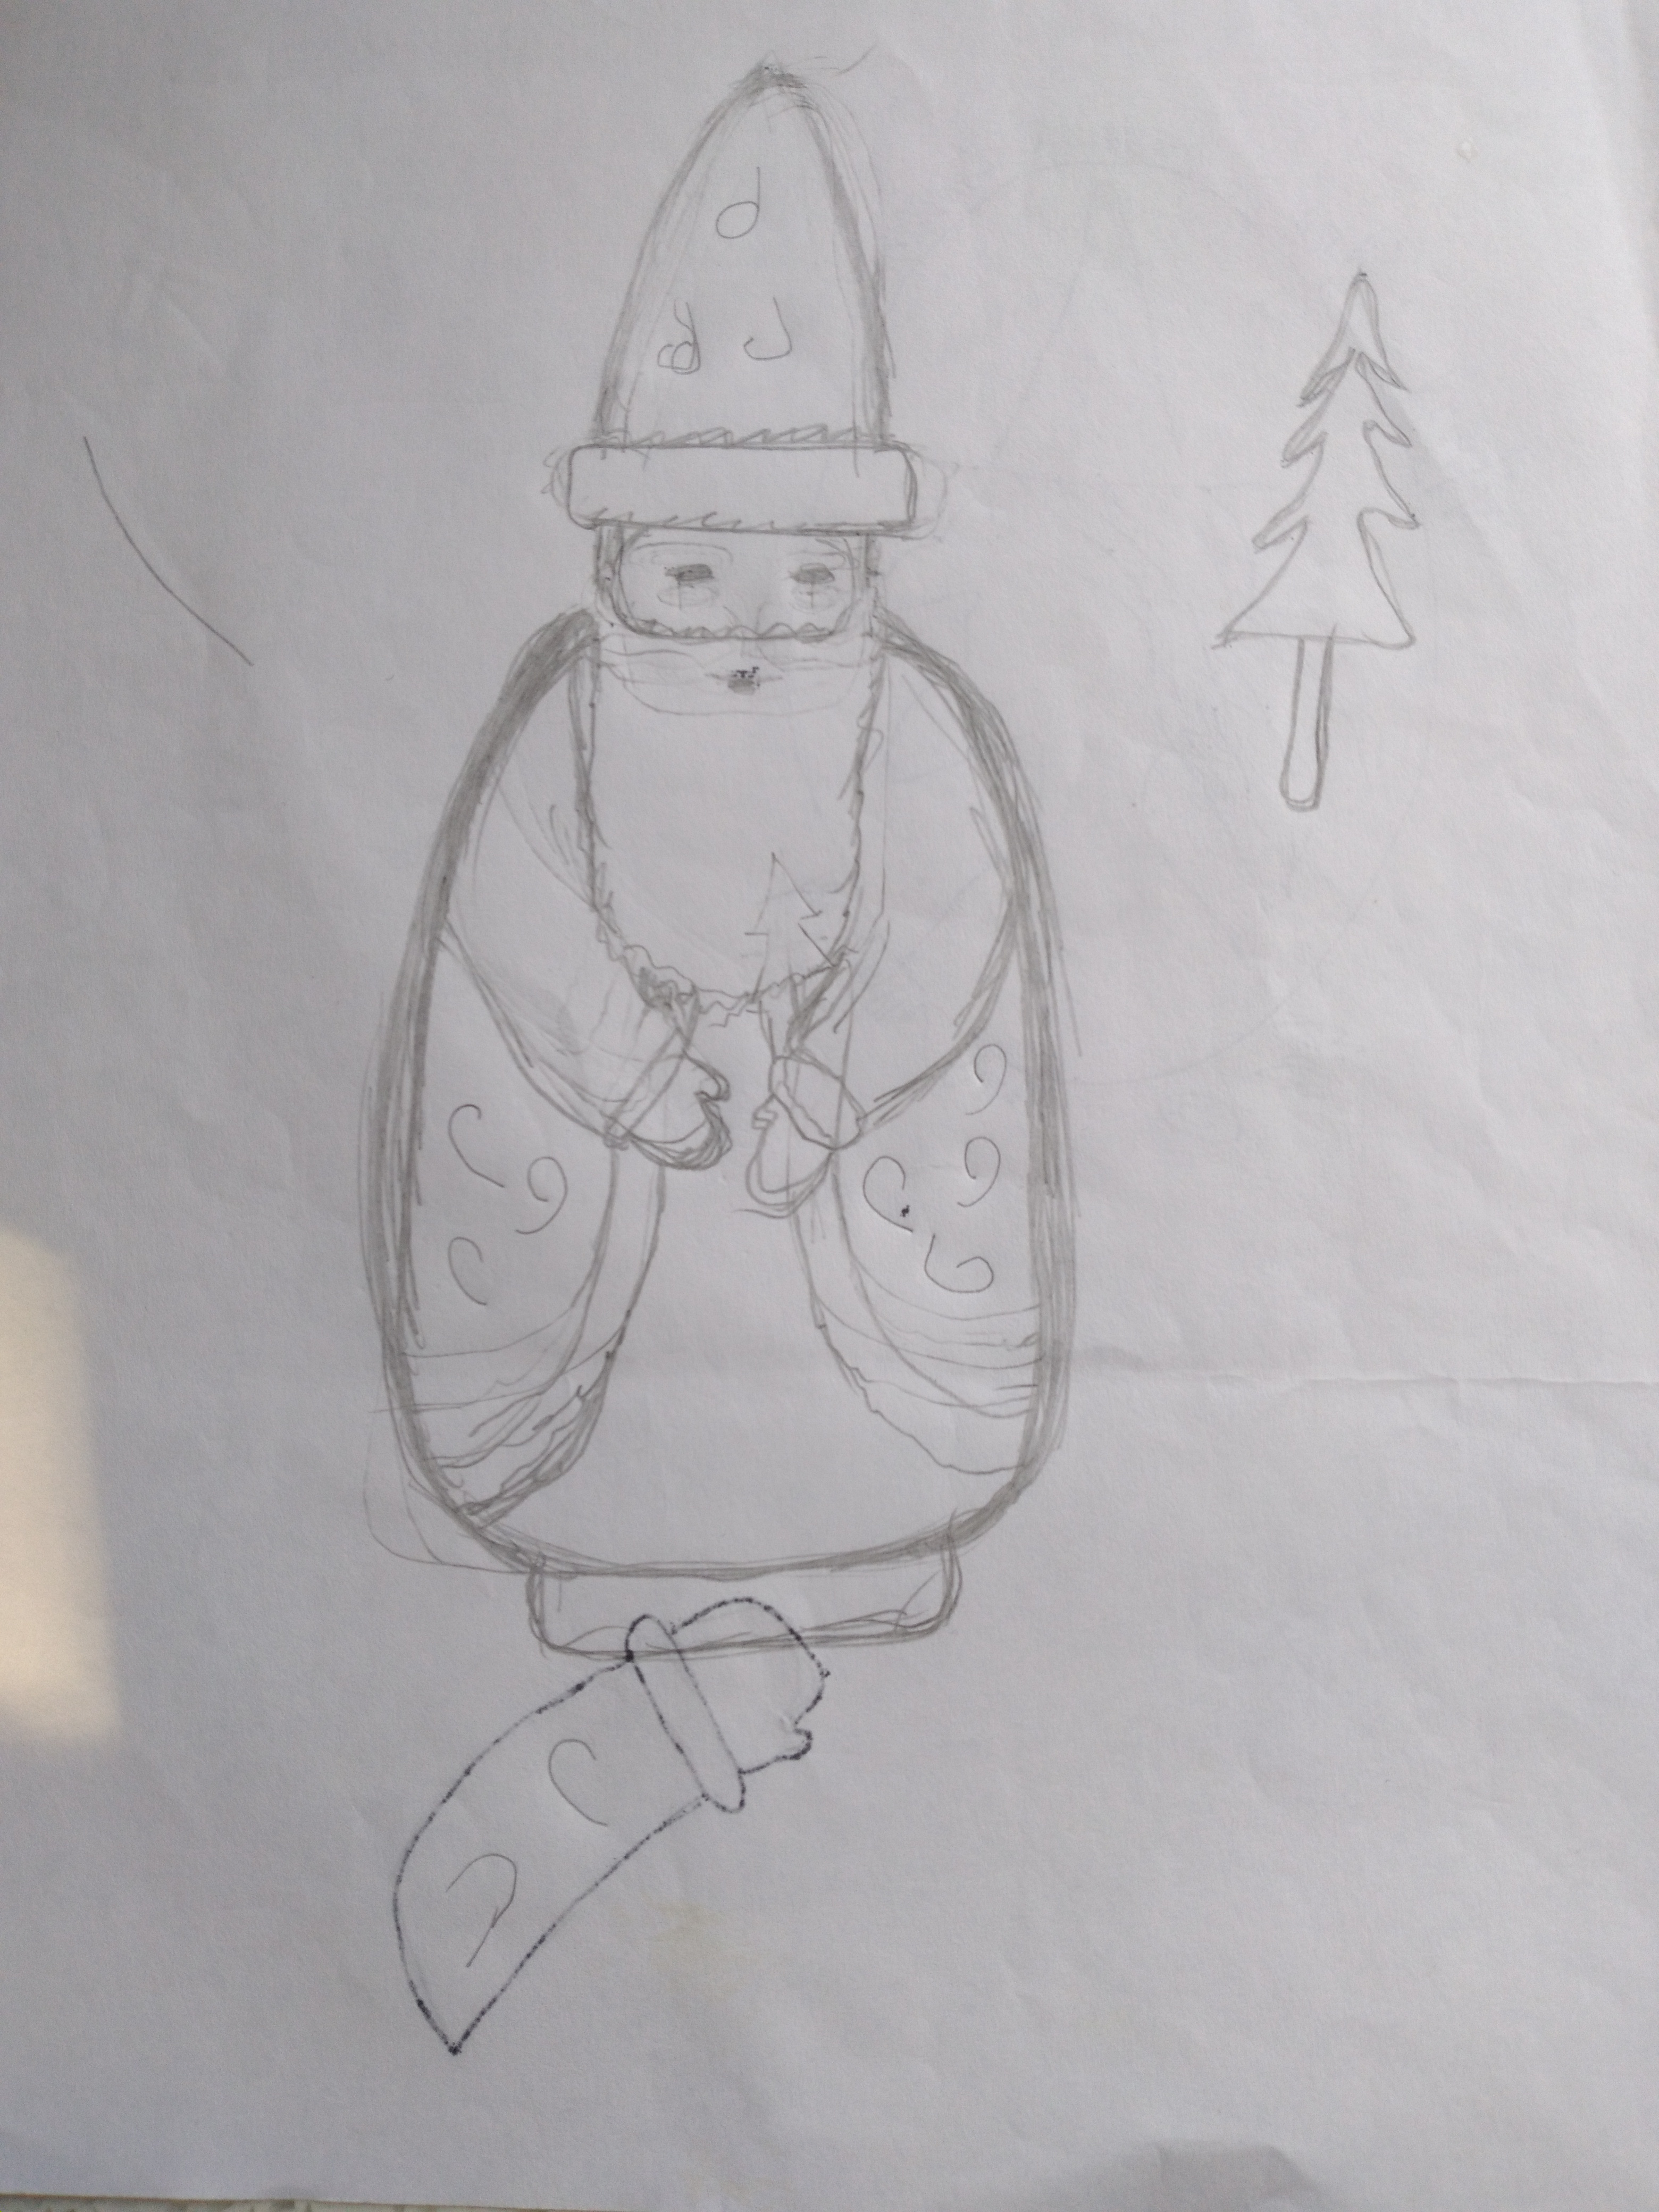
I added a picture of the drawing I used to create Father Christmas. I actually traced the main piece onto the weavers cloth without arms. I drew the arm on the back of the sheet. But since you need two opposite arms I held it up to a window to get a mirror image. As I said before it’s quite primitive, but play with it as you please. Be sure to show me your results!
Thanks for stopping by. Now it’s time to clean the living/dining/craft room. I’m excited to see the color of my desk as it has been covered with ‘stuff’ for several weeks.
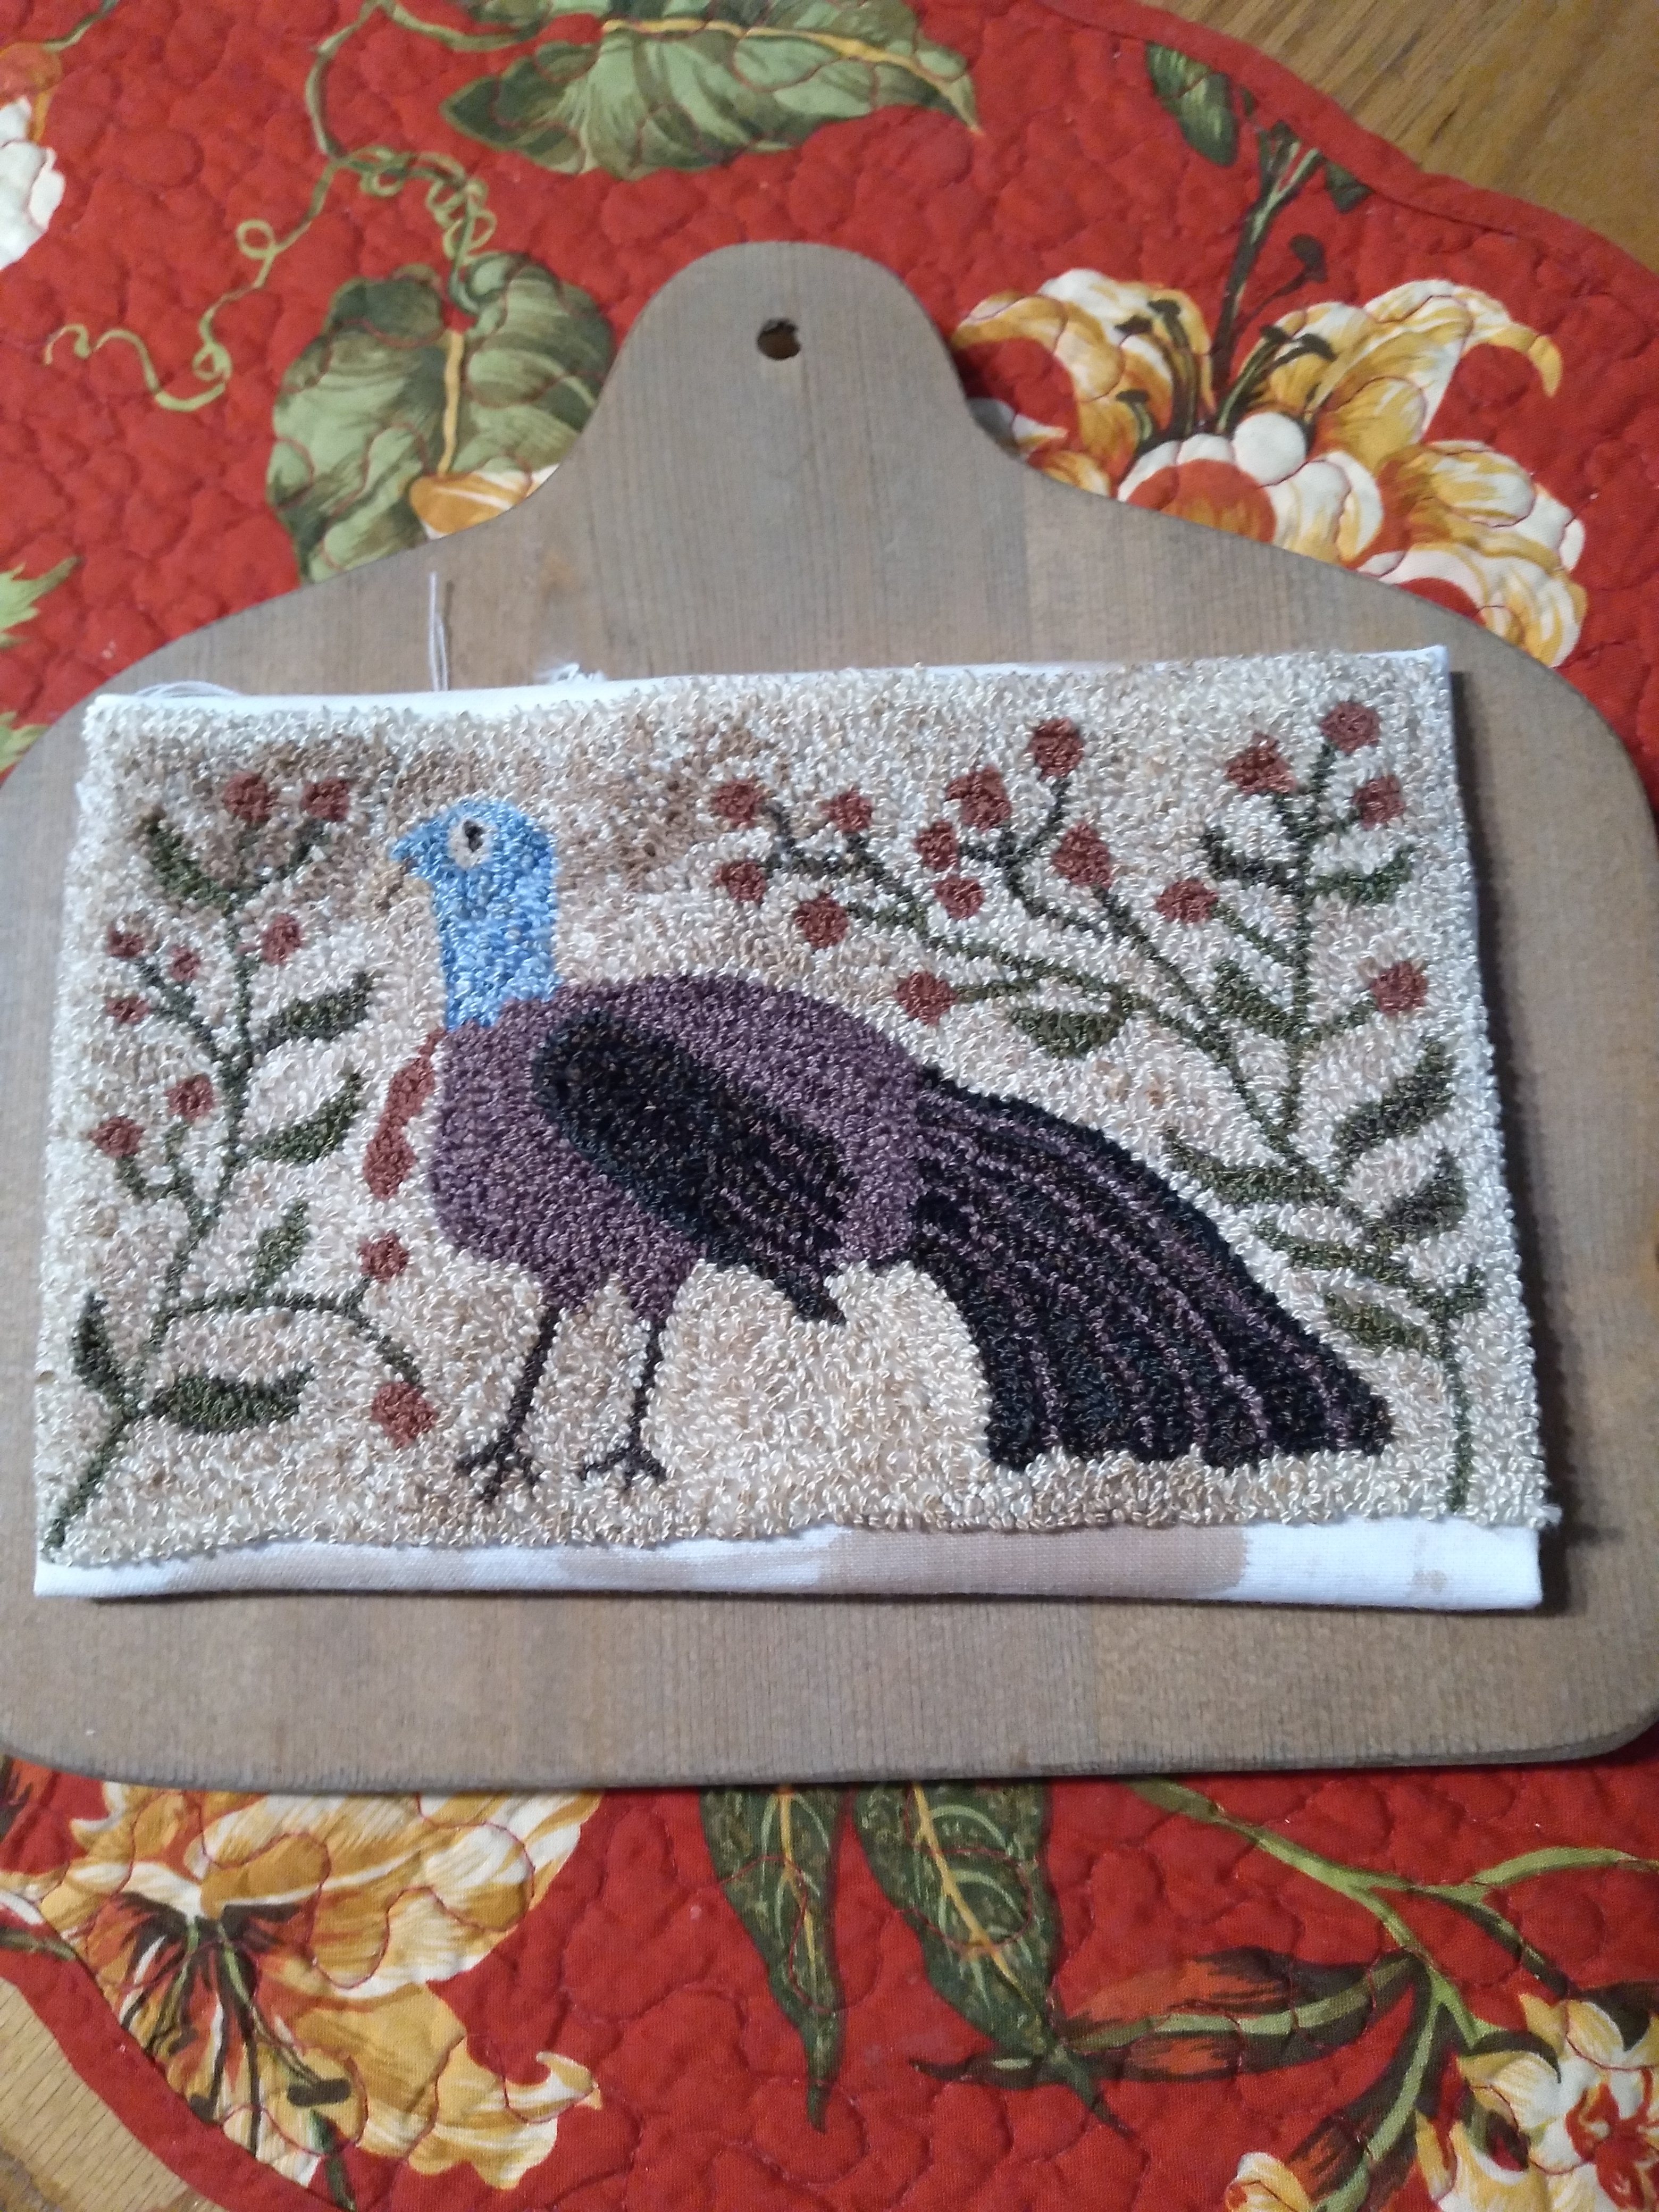
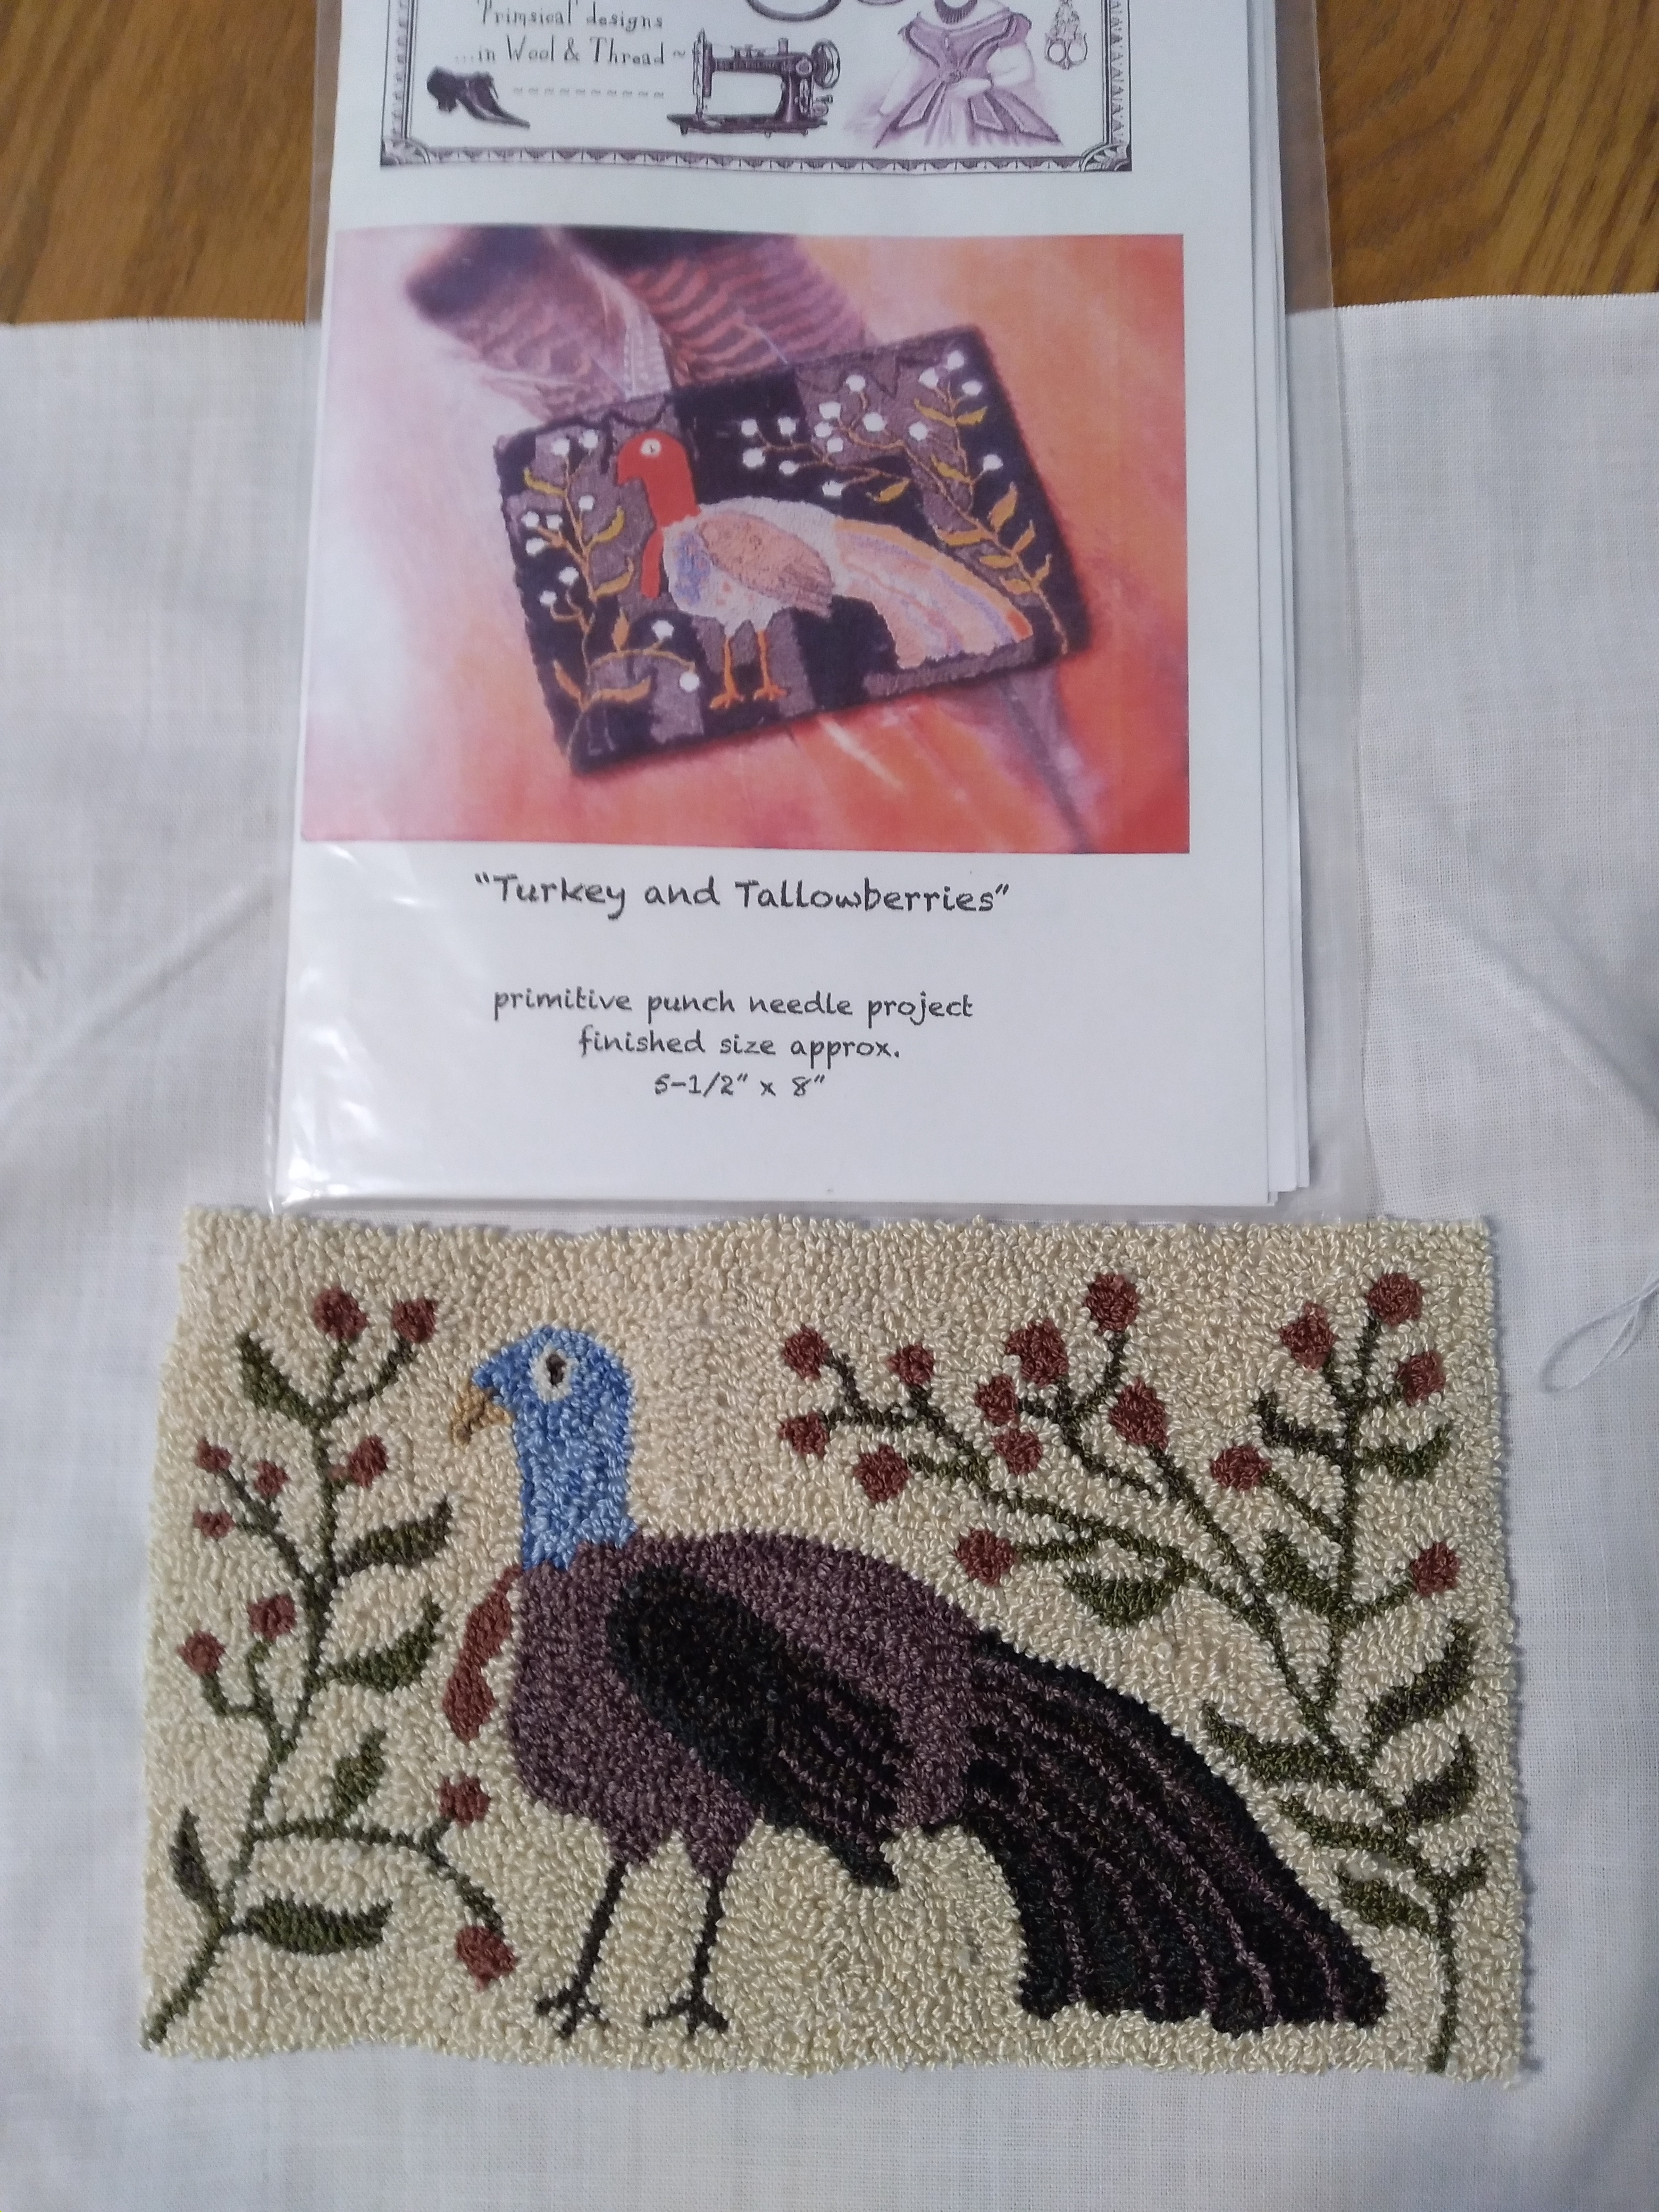
Things are moving along here at Yooper Trails. ‘Turkey and Tallowberries’ is waiting for the final finish. I decided to use a mustard colored hornbook and the process is taking awhile.
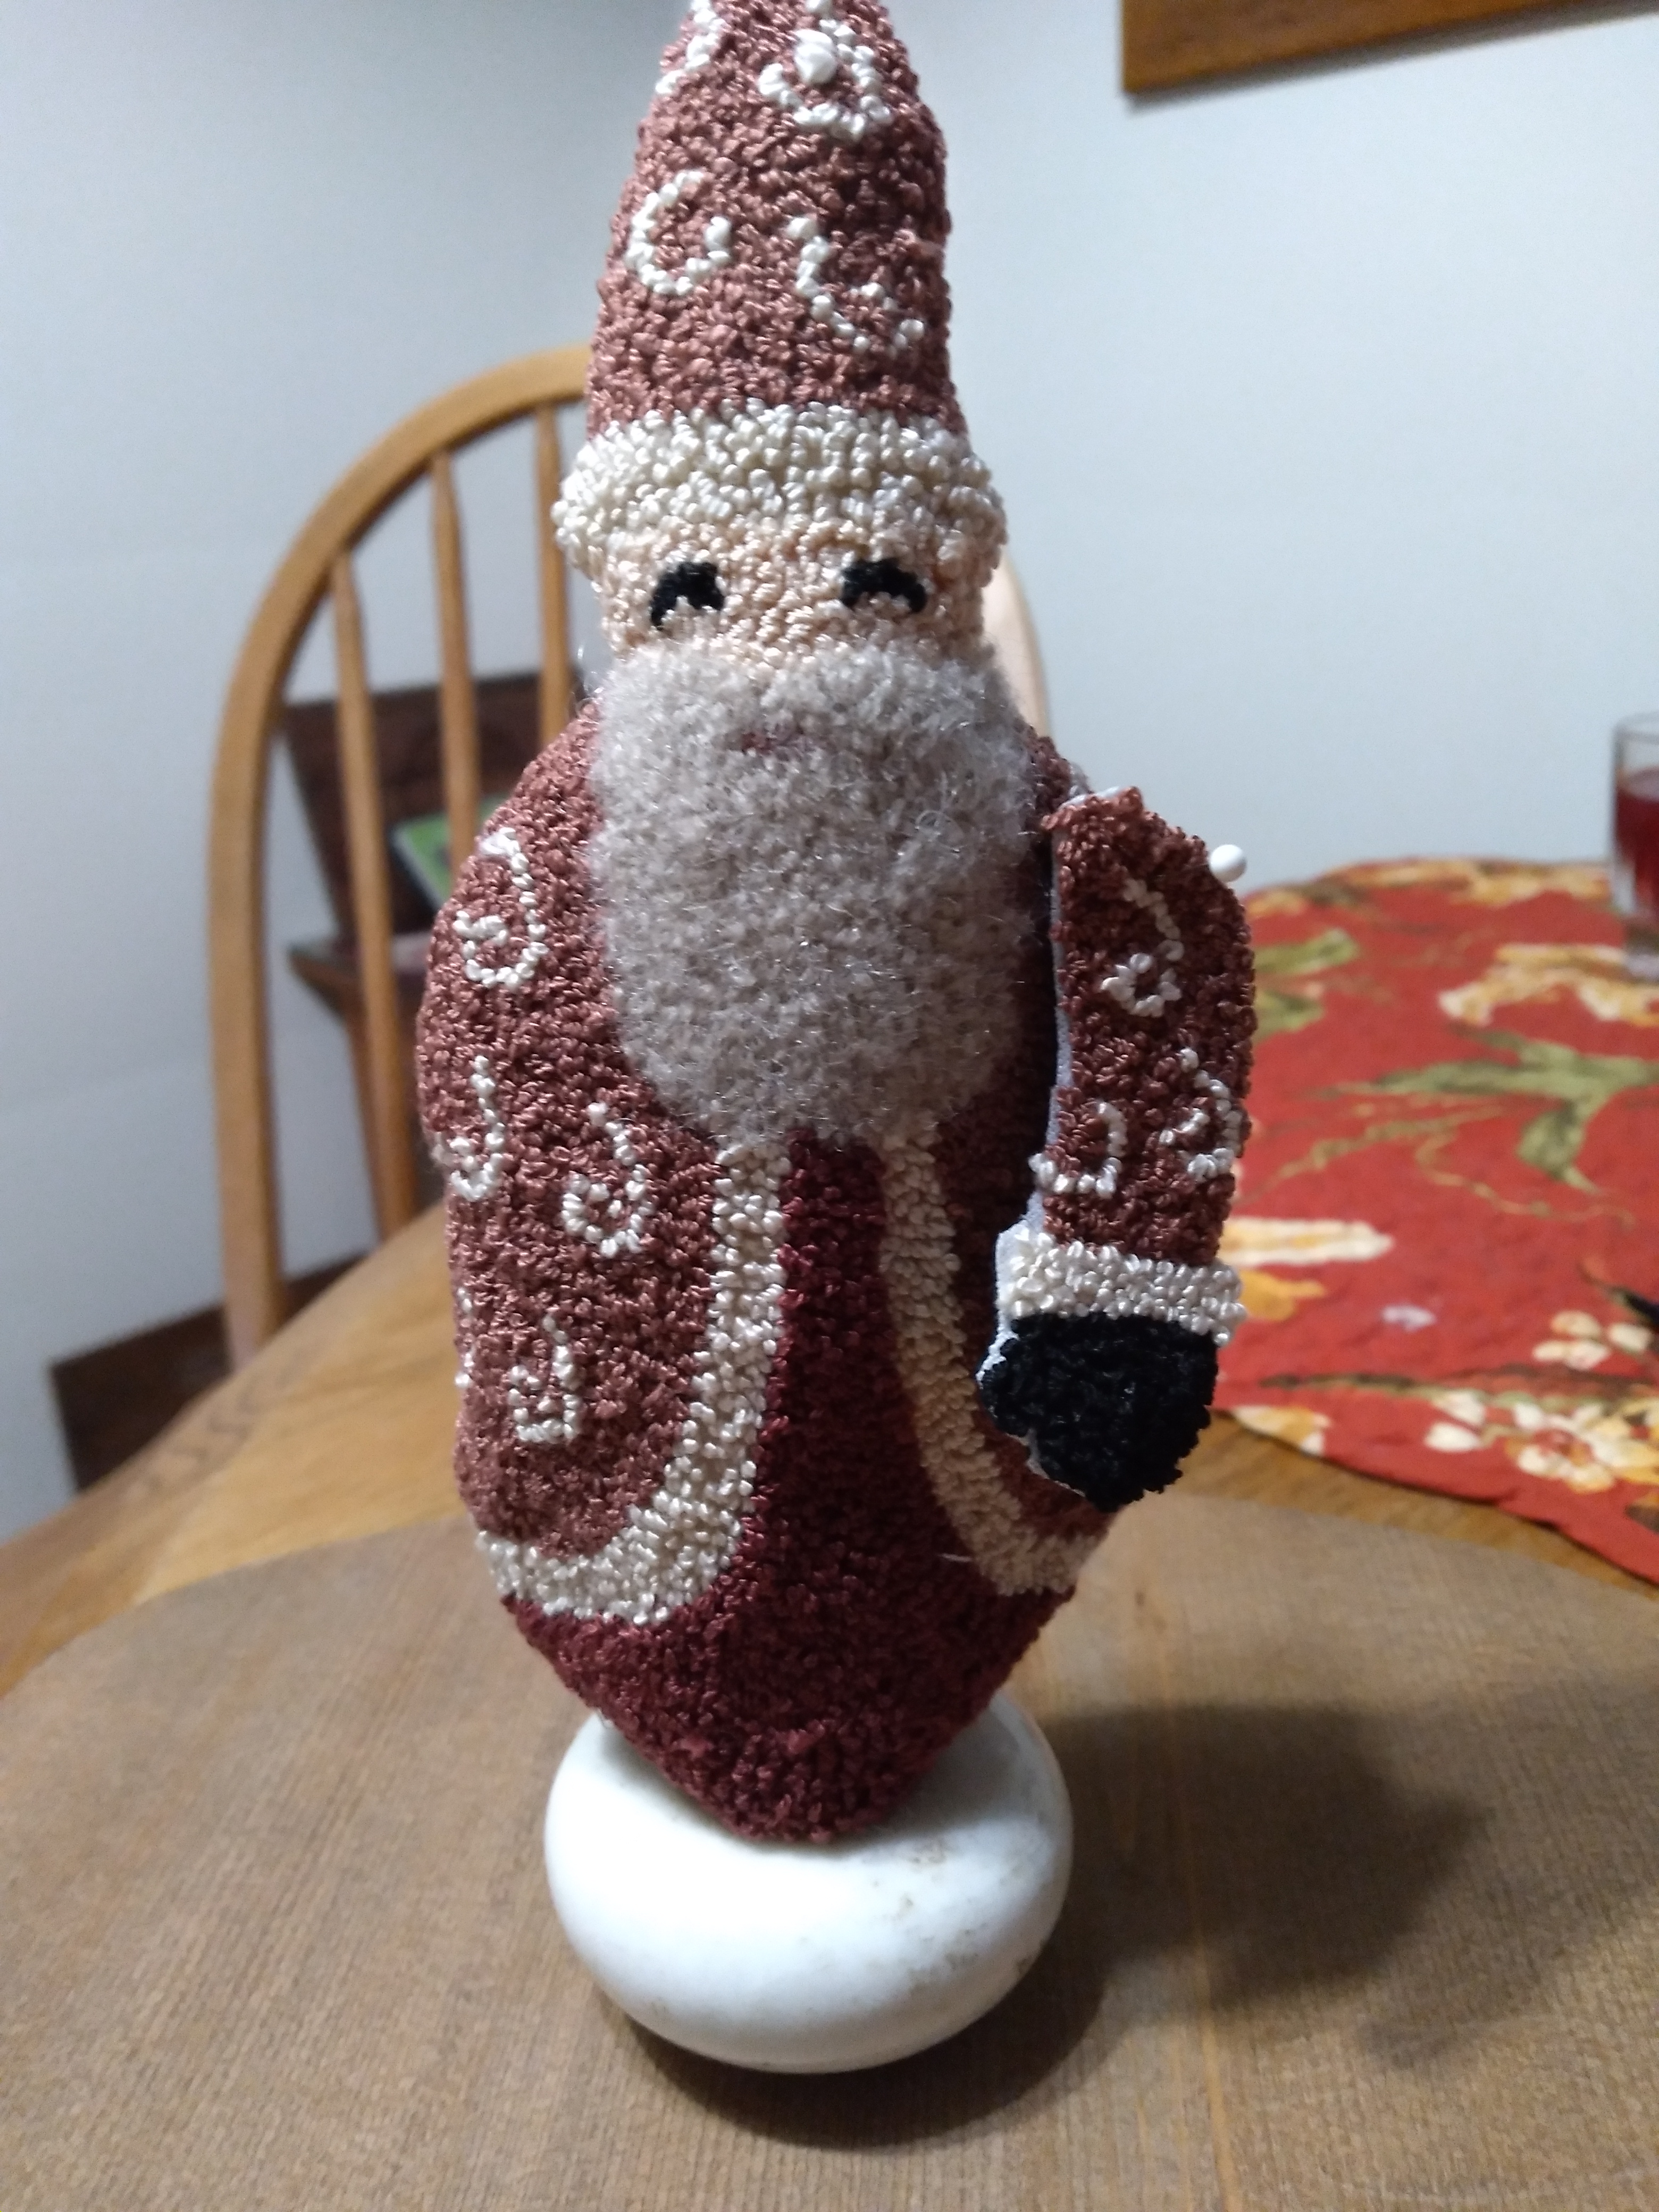
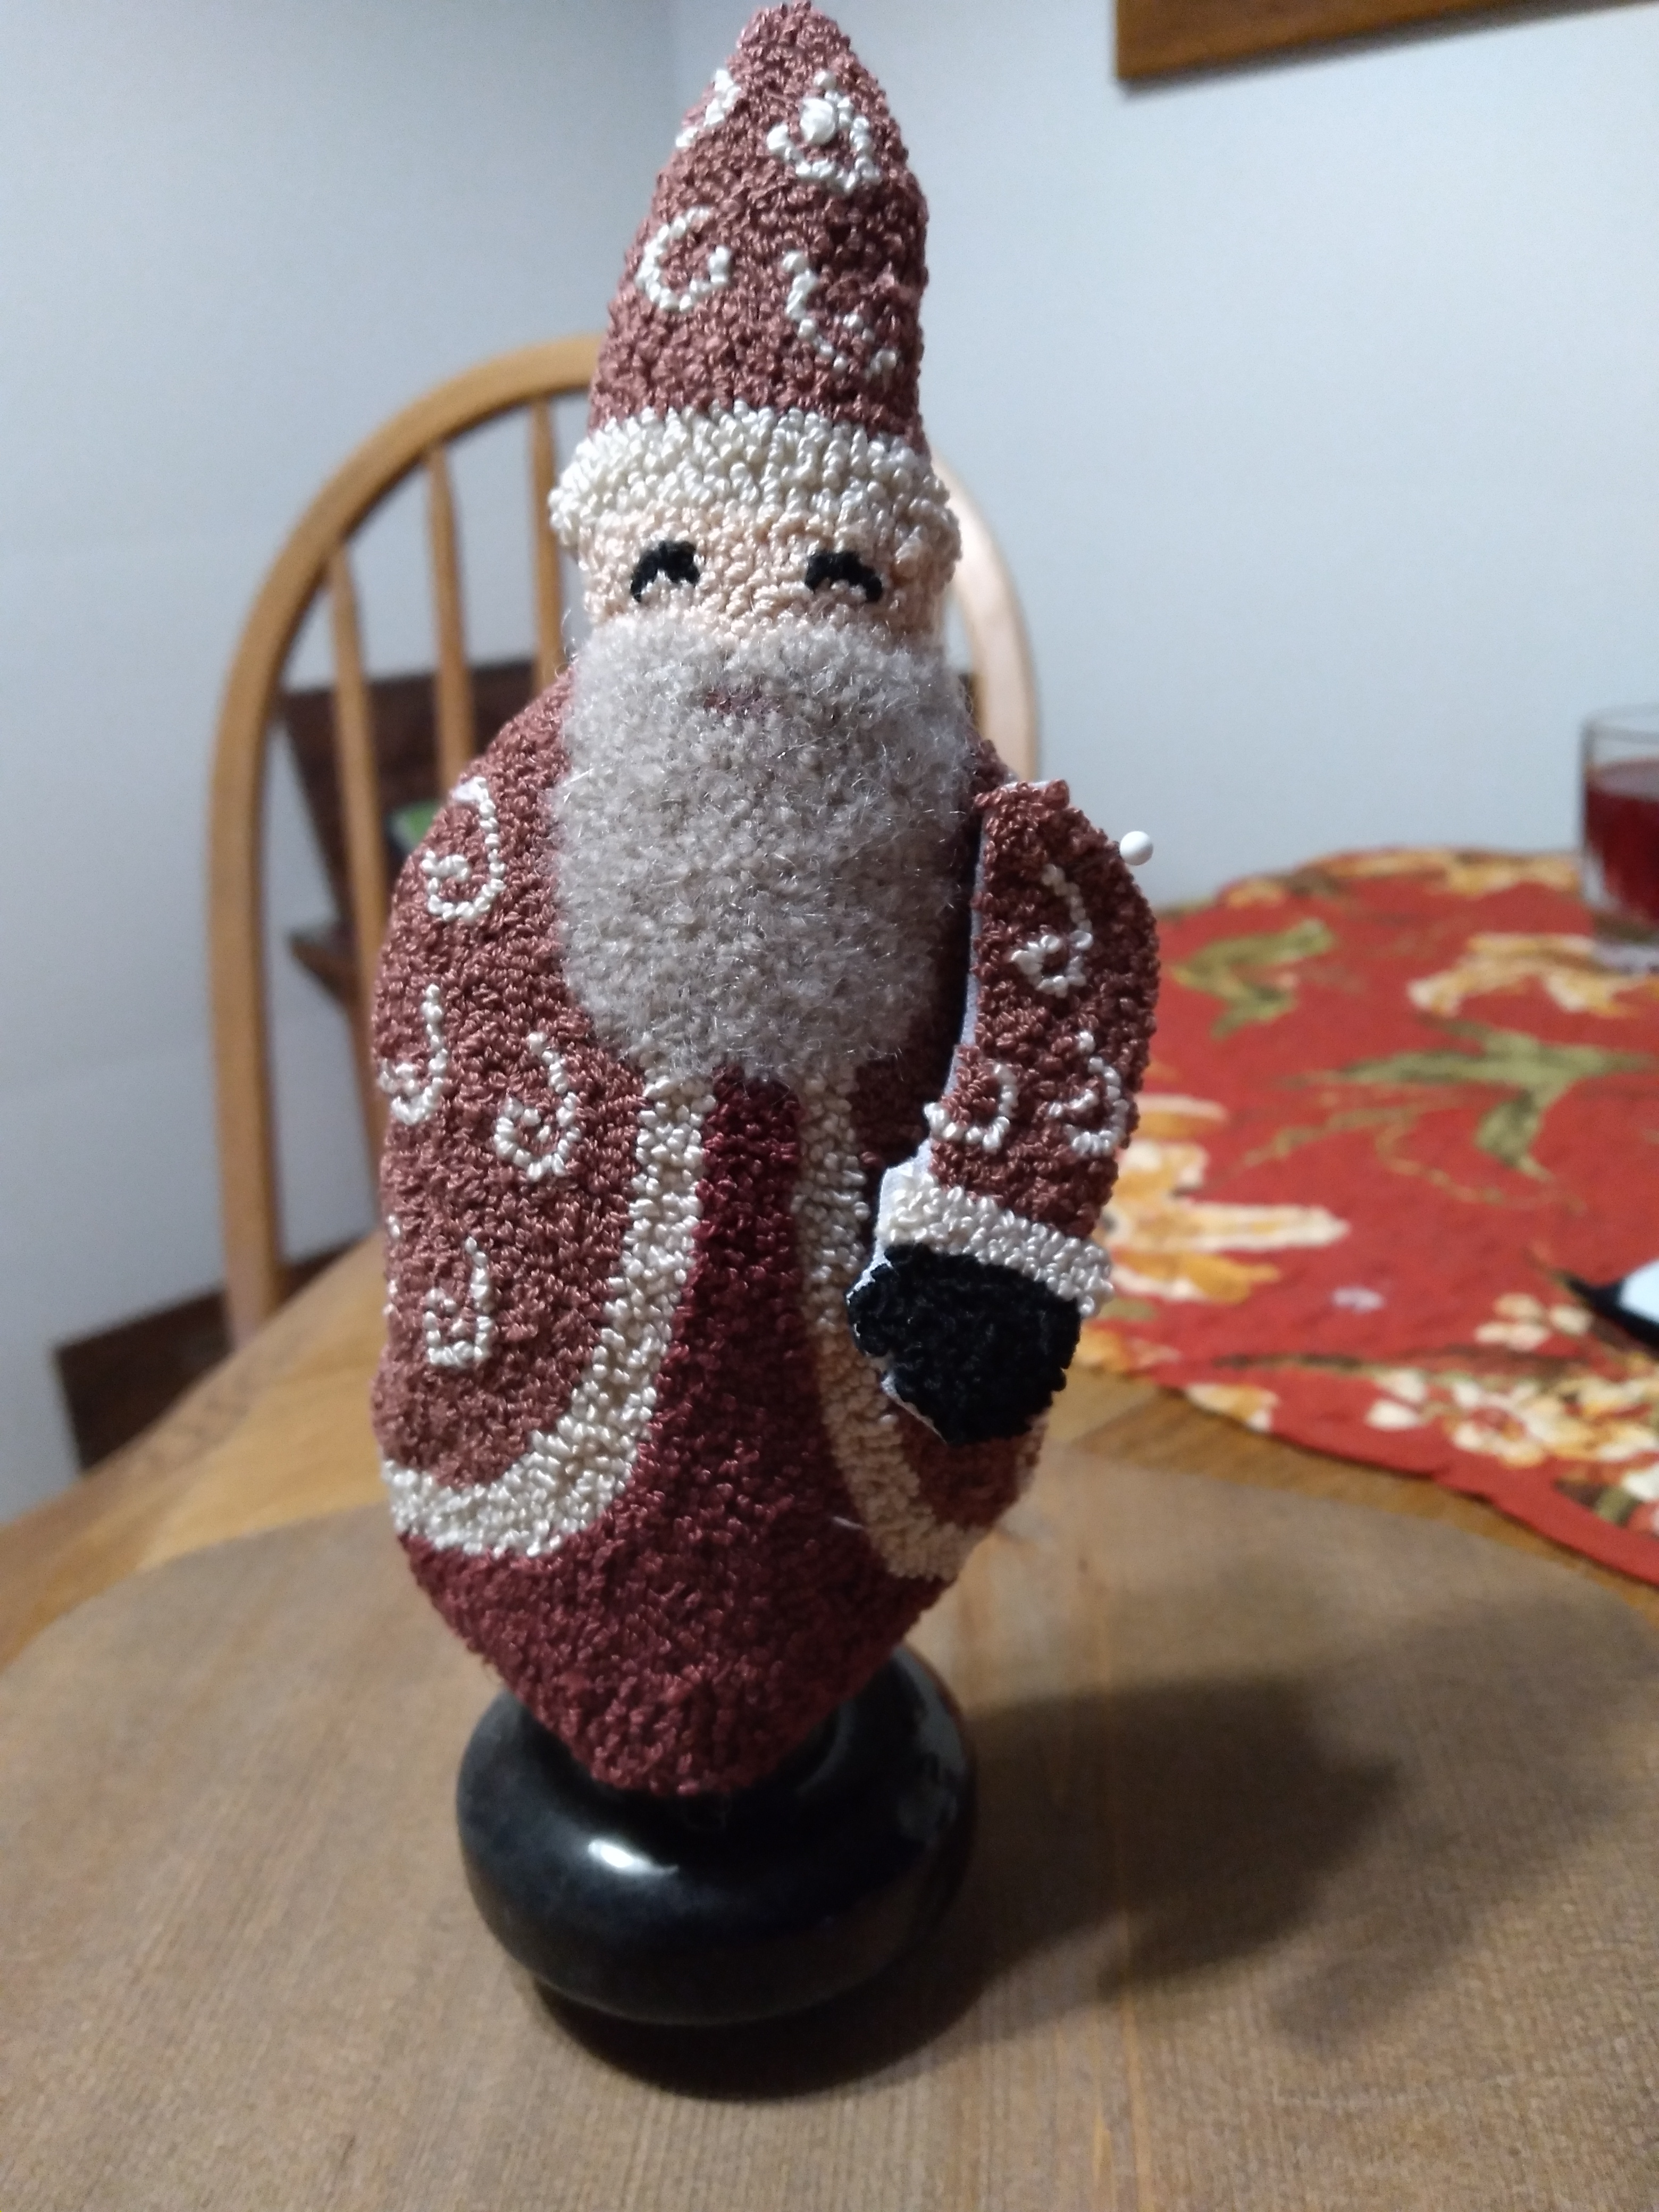
Meanwhile, I am working on some things for Christmas. Here is Father Christmas. These pictures show works in progress. I have one arm pinned on right now. Of course there will be another arm and he will hold a small Christmas tree. I used mohair for his beard. This is a pattern I drew. As soon as I get the picture uploaded feel free to copy it. No pattern, just a pic you are free to play with. I’m deciding if I want the doorknob base in black or white. What do you think?
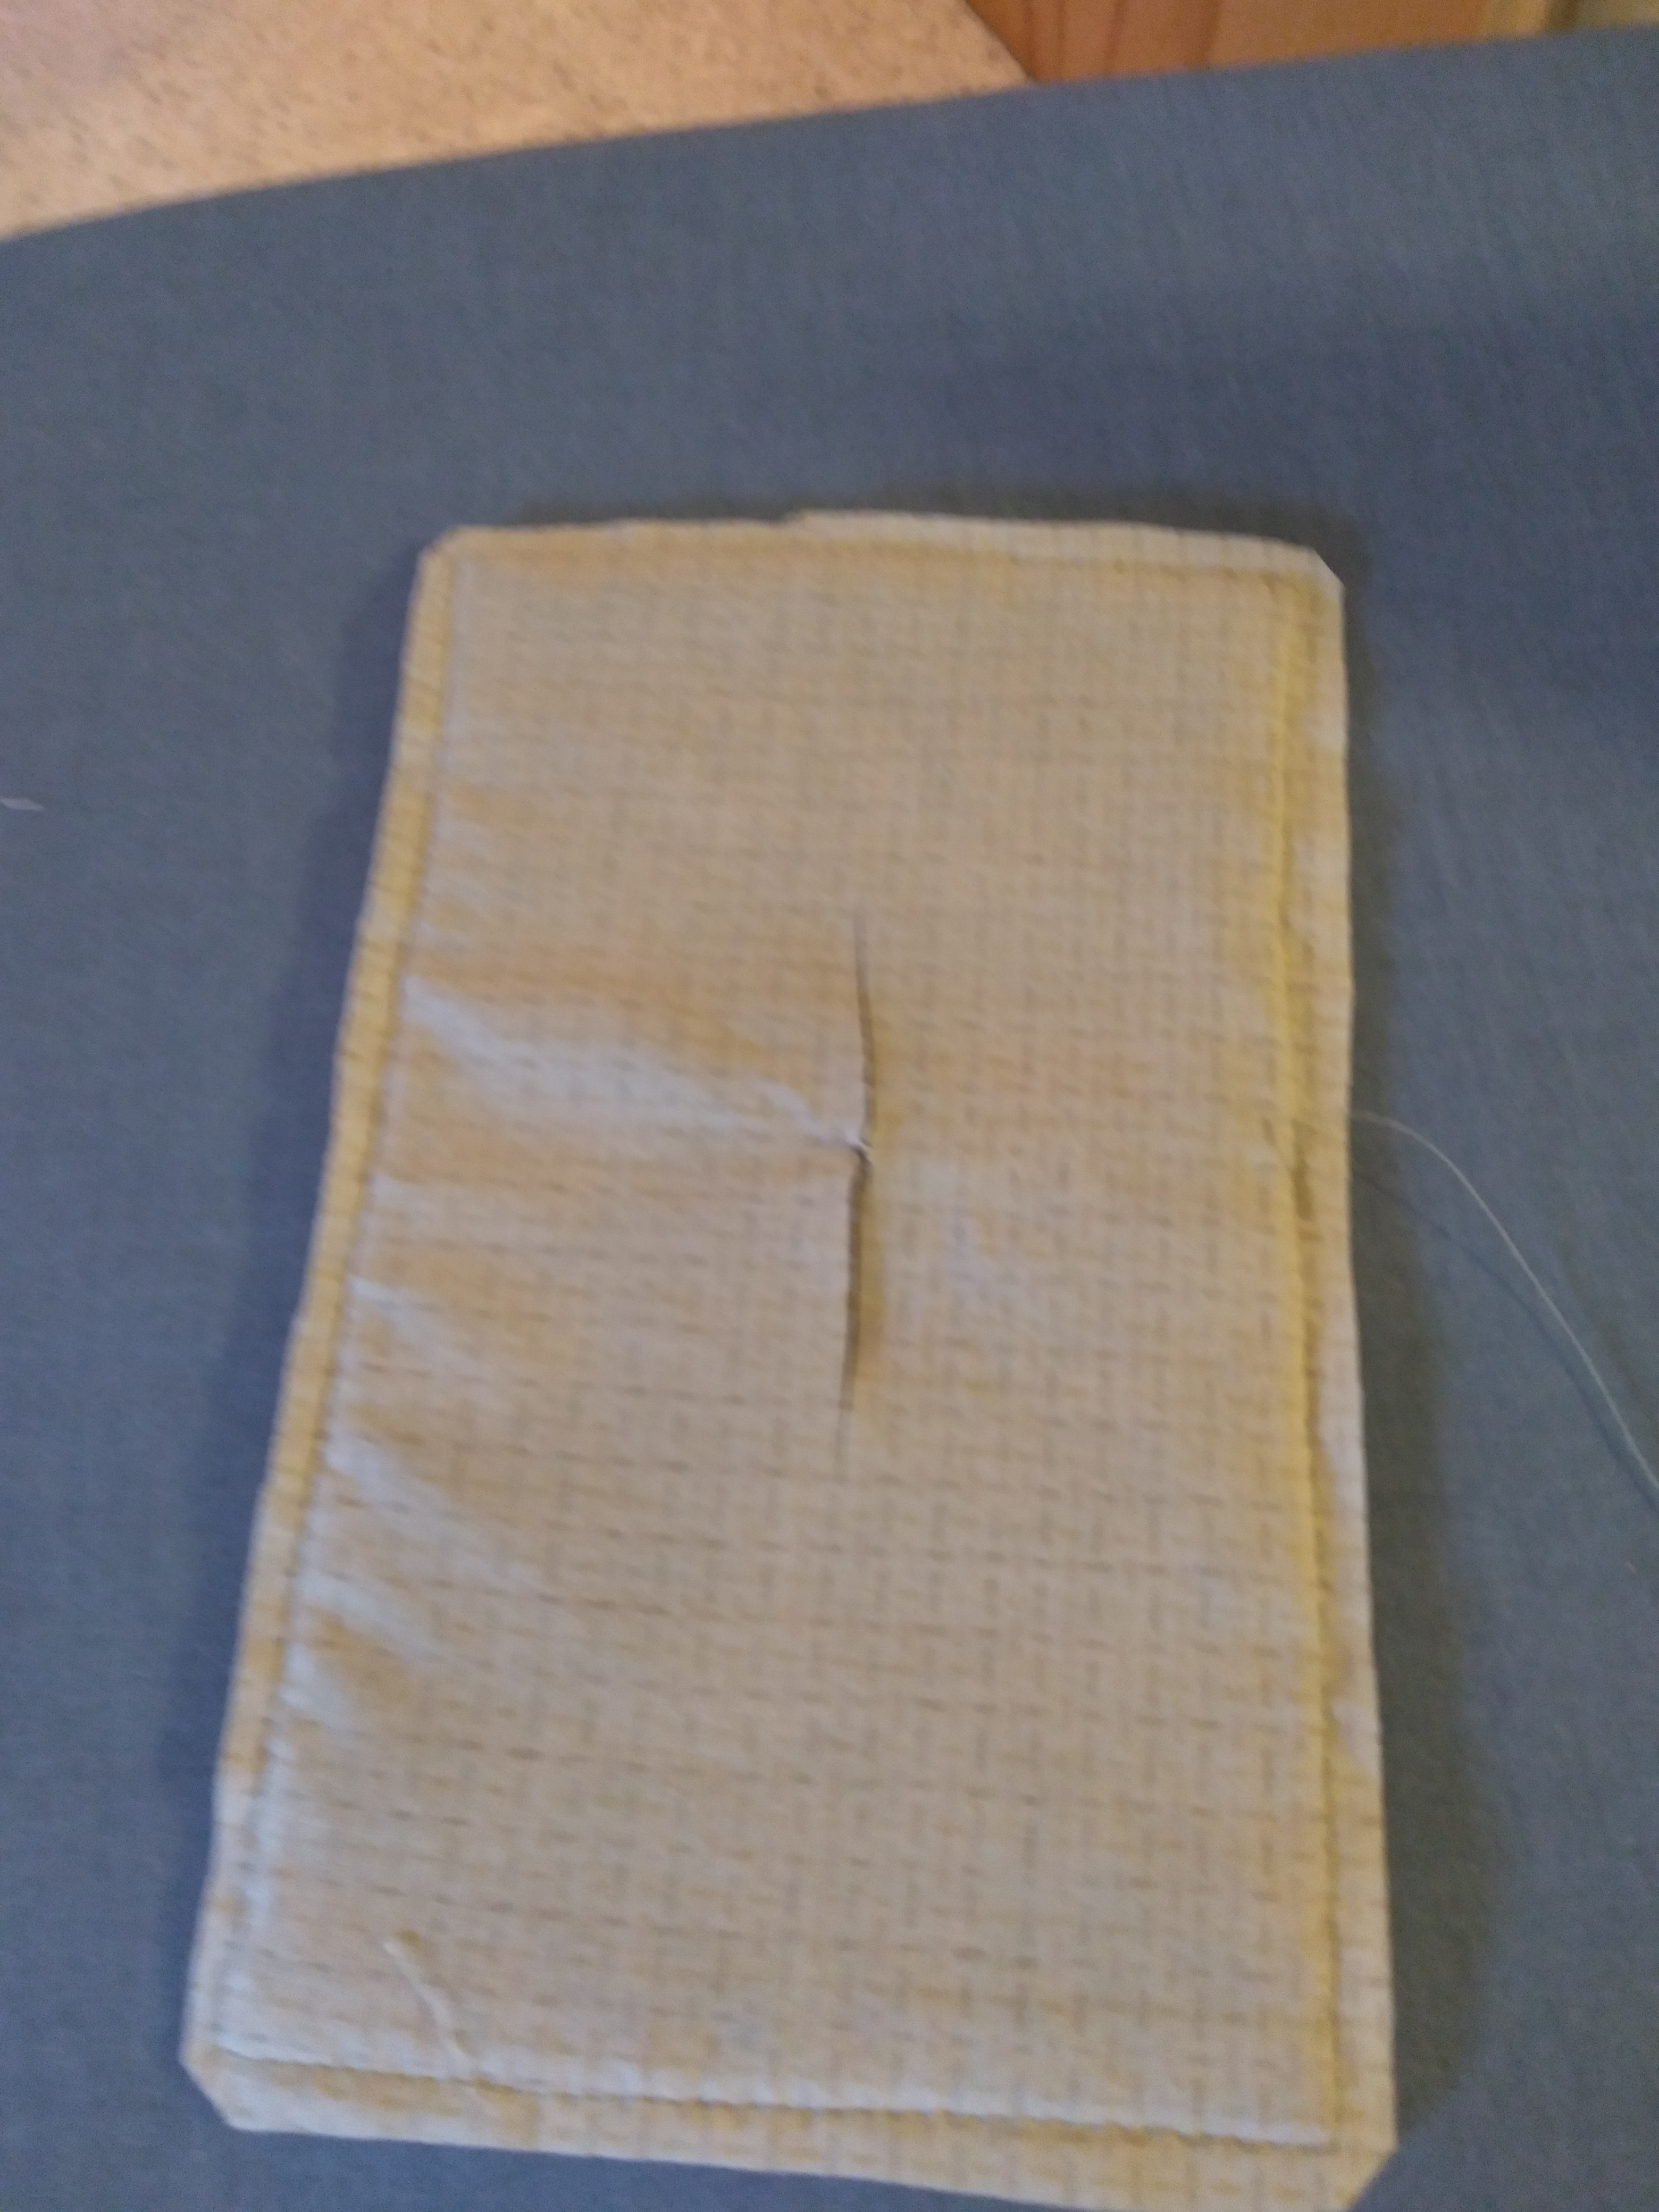
I talked about methods of finishing pieces. This first picture shows a piece that will be mounted on a board. Note it is sewed completely around the perimeter and I cut a small slit. After I turned it right side out I steamed the edges. This one is also waiting for a coat of Briwax to dry before I attach it. Briwax is like Minwax, but has a slight tint of color.The second picture will be inverted and the opening will be hand-sewn. I usually leave the opening more centered, but this will be fine. I just want to show how I trim it leaving a longer piece of fabric to fold inside. It makes the hand sewing a lot easier.
I’m eager for your comments on the doorknob choice.
If you are wondering about walnut crystals you can find them for sale on the internet. It looks like dark instant coffee and one or two tablespoons added to a pint of water will give you enough to last for years. I did see a site showing how to make your own, but the price of the finished product wasn’t very much. I’ve had a little bag for years and have only used a few tablespoons.
So, I antiqued my piece this morning. It needs to dry completely before I continue, but here is a picture. Tomorrow I’ll post a picture showing how I sew a back fabric and attach it to the hornbook.
I like the outcome of the antiquing. What do you think?
The other day as I watched as our neighbors walk their two beautiful boys off to school for another first day I was reminded that September is as much a new beginning as January first every year. We are at the beginning of a new grade of learning, new food menus as the weather cools, pumpkins, turning leaves and a fresh outlook on what’s to come. What better time to get back into communing with my punch needle friends at Yooper Trails Needle Punch!
Today I return to a piece I’ve done before. This is ‘Turkey and Tallowberries from Lori Brechlin at Not Forgotten Farm. Lori has a great selection of prim patterns available. I switched up colors, but I’m showing Lori’s colors in the picture also. I feel like the ecru background is too stark so I’m going to antique the piece with walnut crystals. I’ll post that picture when it’s done and you can let me know if you agree or if you like the original better. The thing about antiquing with the walnut crystals, you can rinse it out (so I’m told. Actually I’ve always been happy with the process)
With summer ending it is also time to think about our monthly punching get-togethers. More news to come on that.
Thanks for dropping in. Let me know what you are working on these days.
It’s a lovely day here as we await the solar eclipse this afternoon. Punch needle has come a long way since I discovered the art some 12 years ago. I’m happy to see how many people love the art and want to learn. With that in mind we have been gathering monthly to share and learn from each other.
Our next drop in night will be on Thursday, April 18. If you are interested in joining us, contact me through MY NEW EMAIL ADDRESS, marionschmidlin@gmail.com
With that in mind, I lost my wowway email and therefore all my contacts. If you thought you were part of my contacts and would like to receive future notices from me, please email me at the gmail address above and I will add you to my contact list.
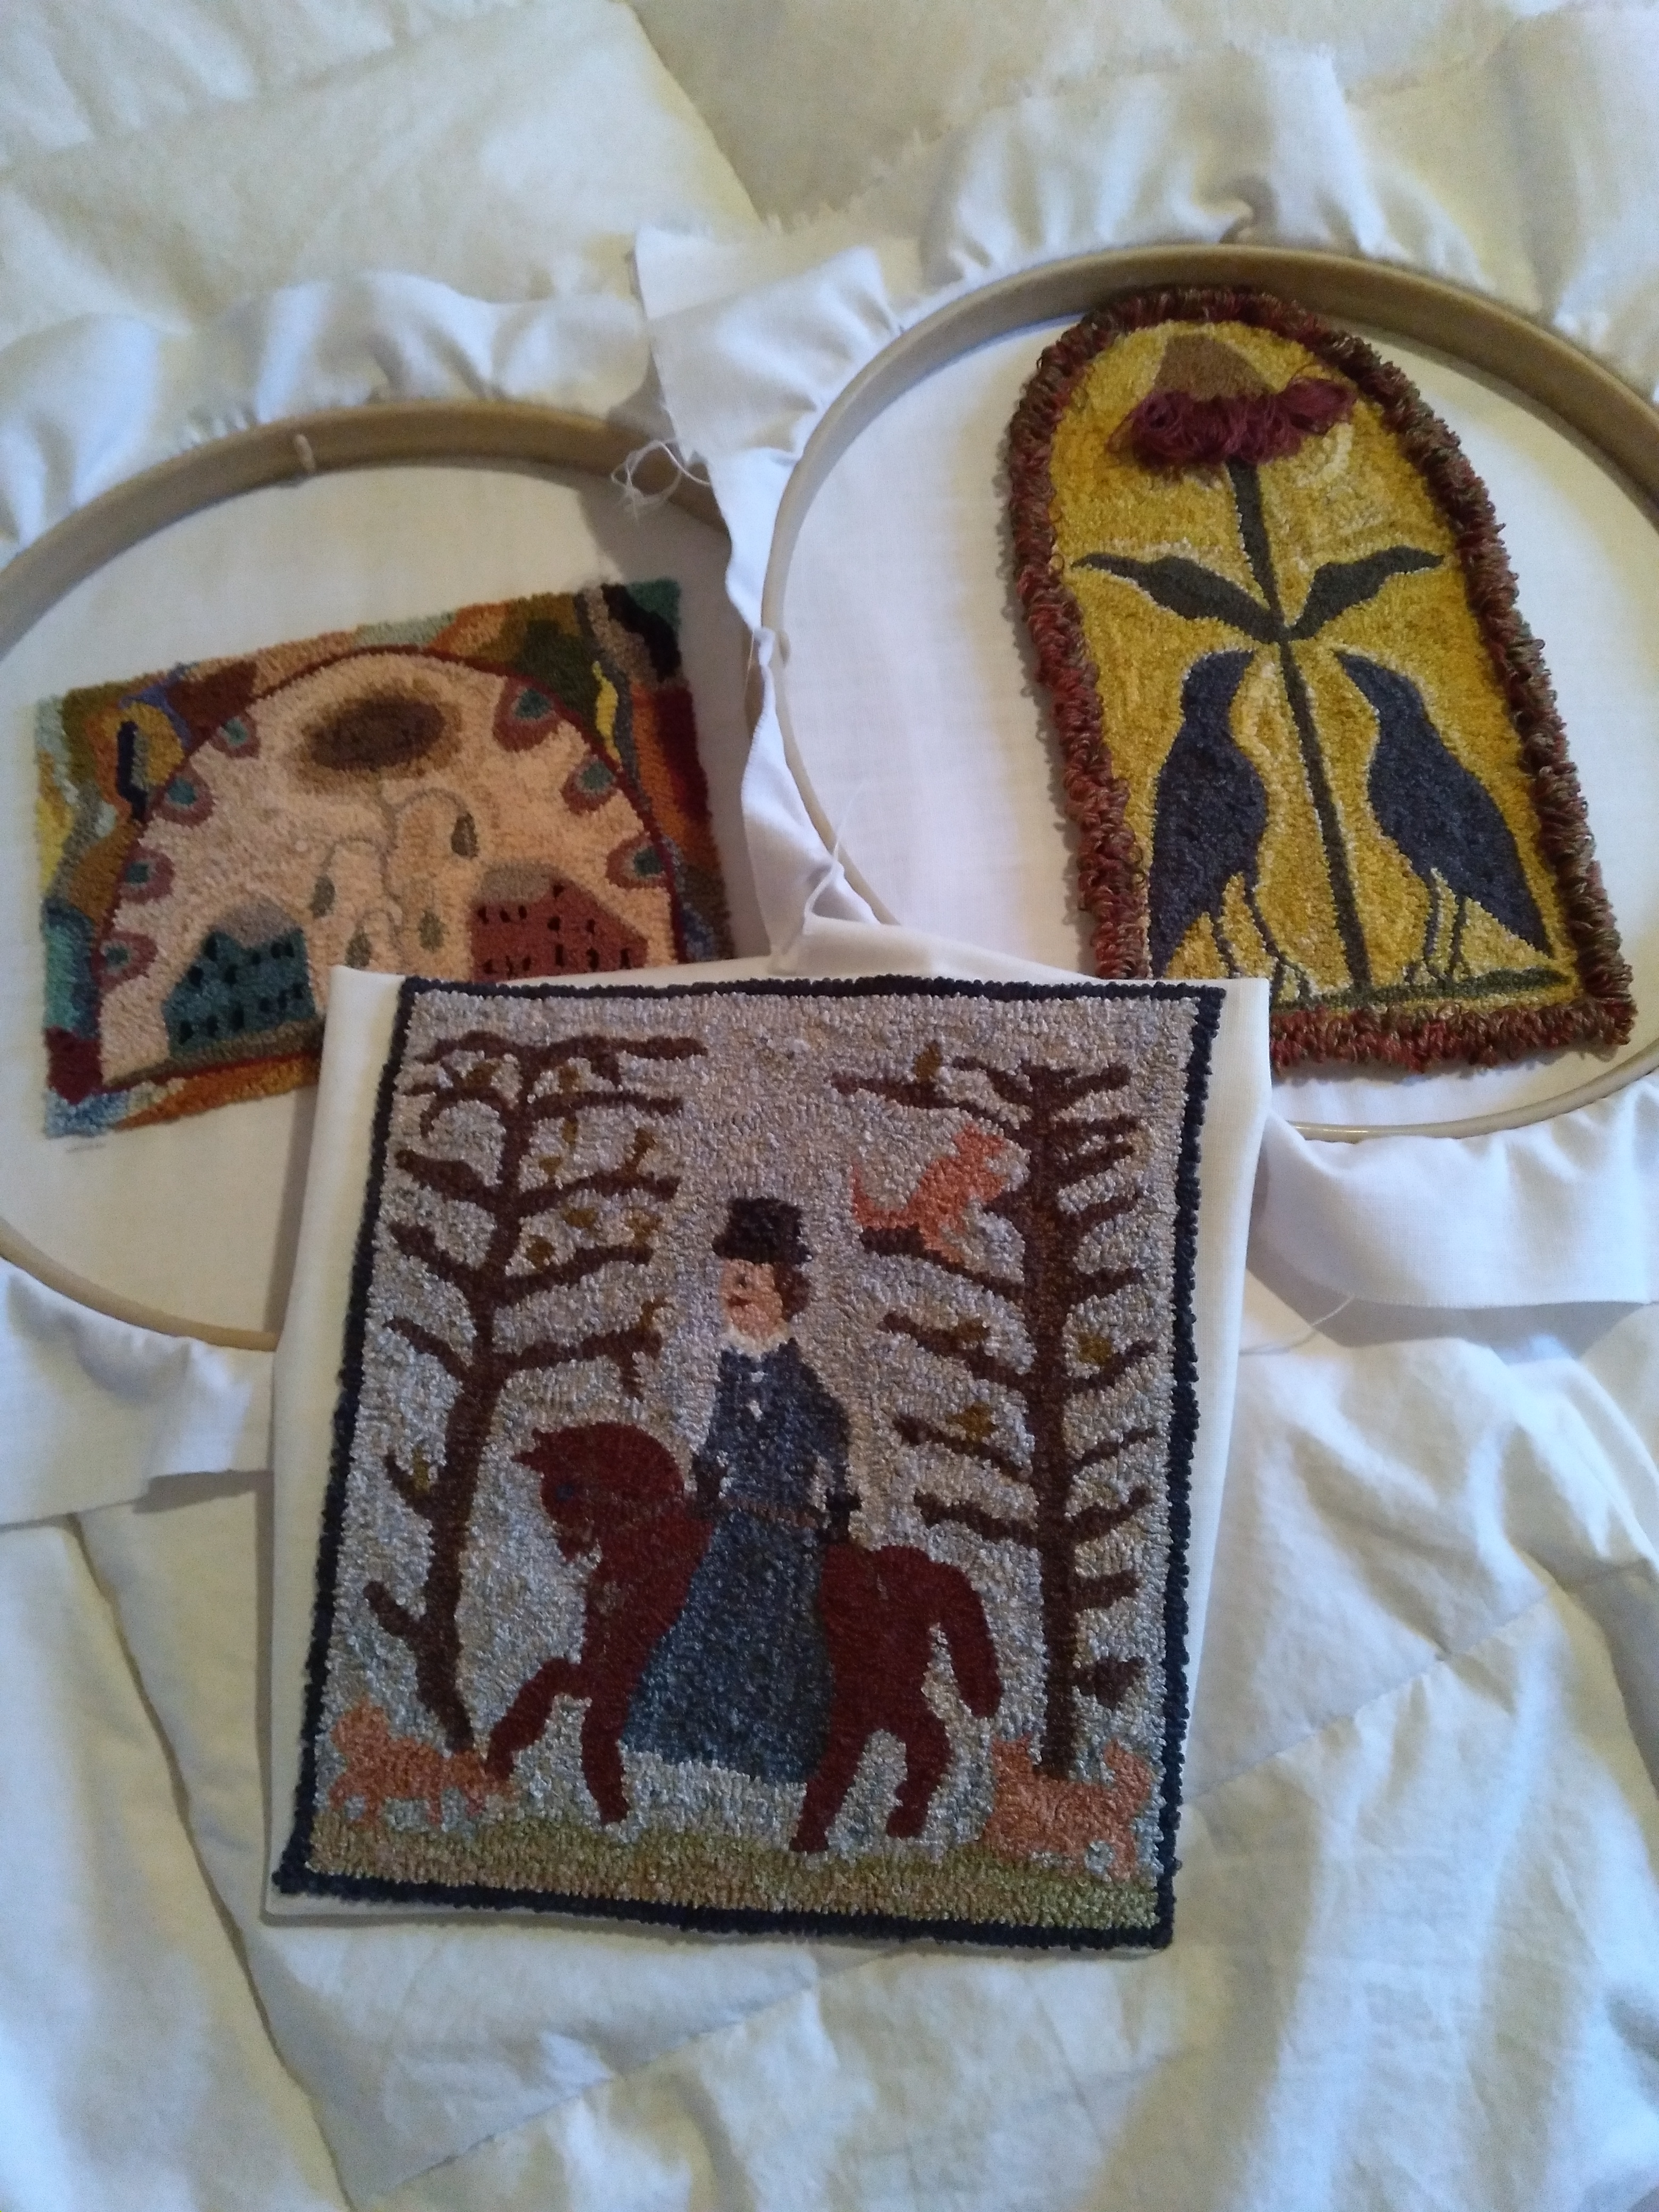
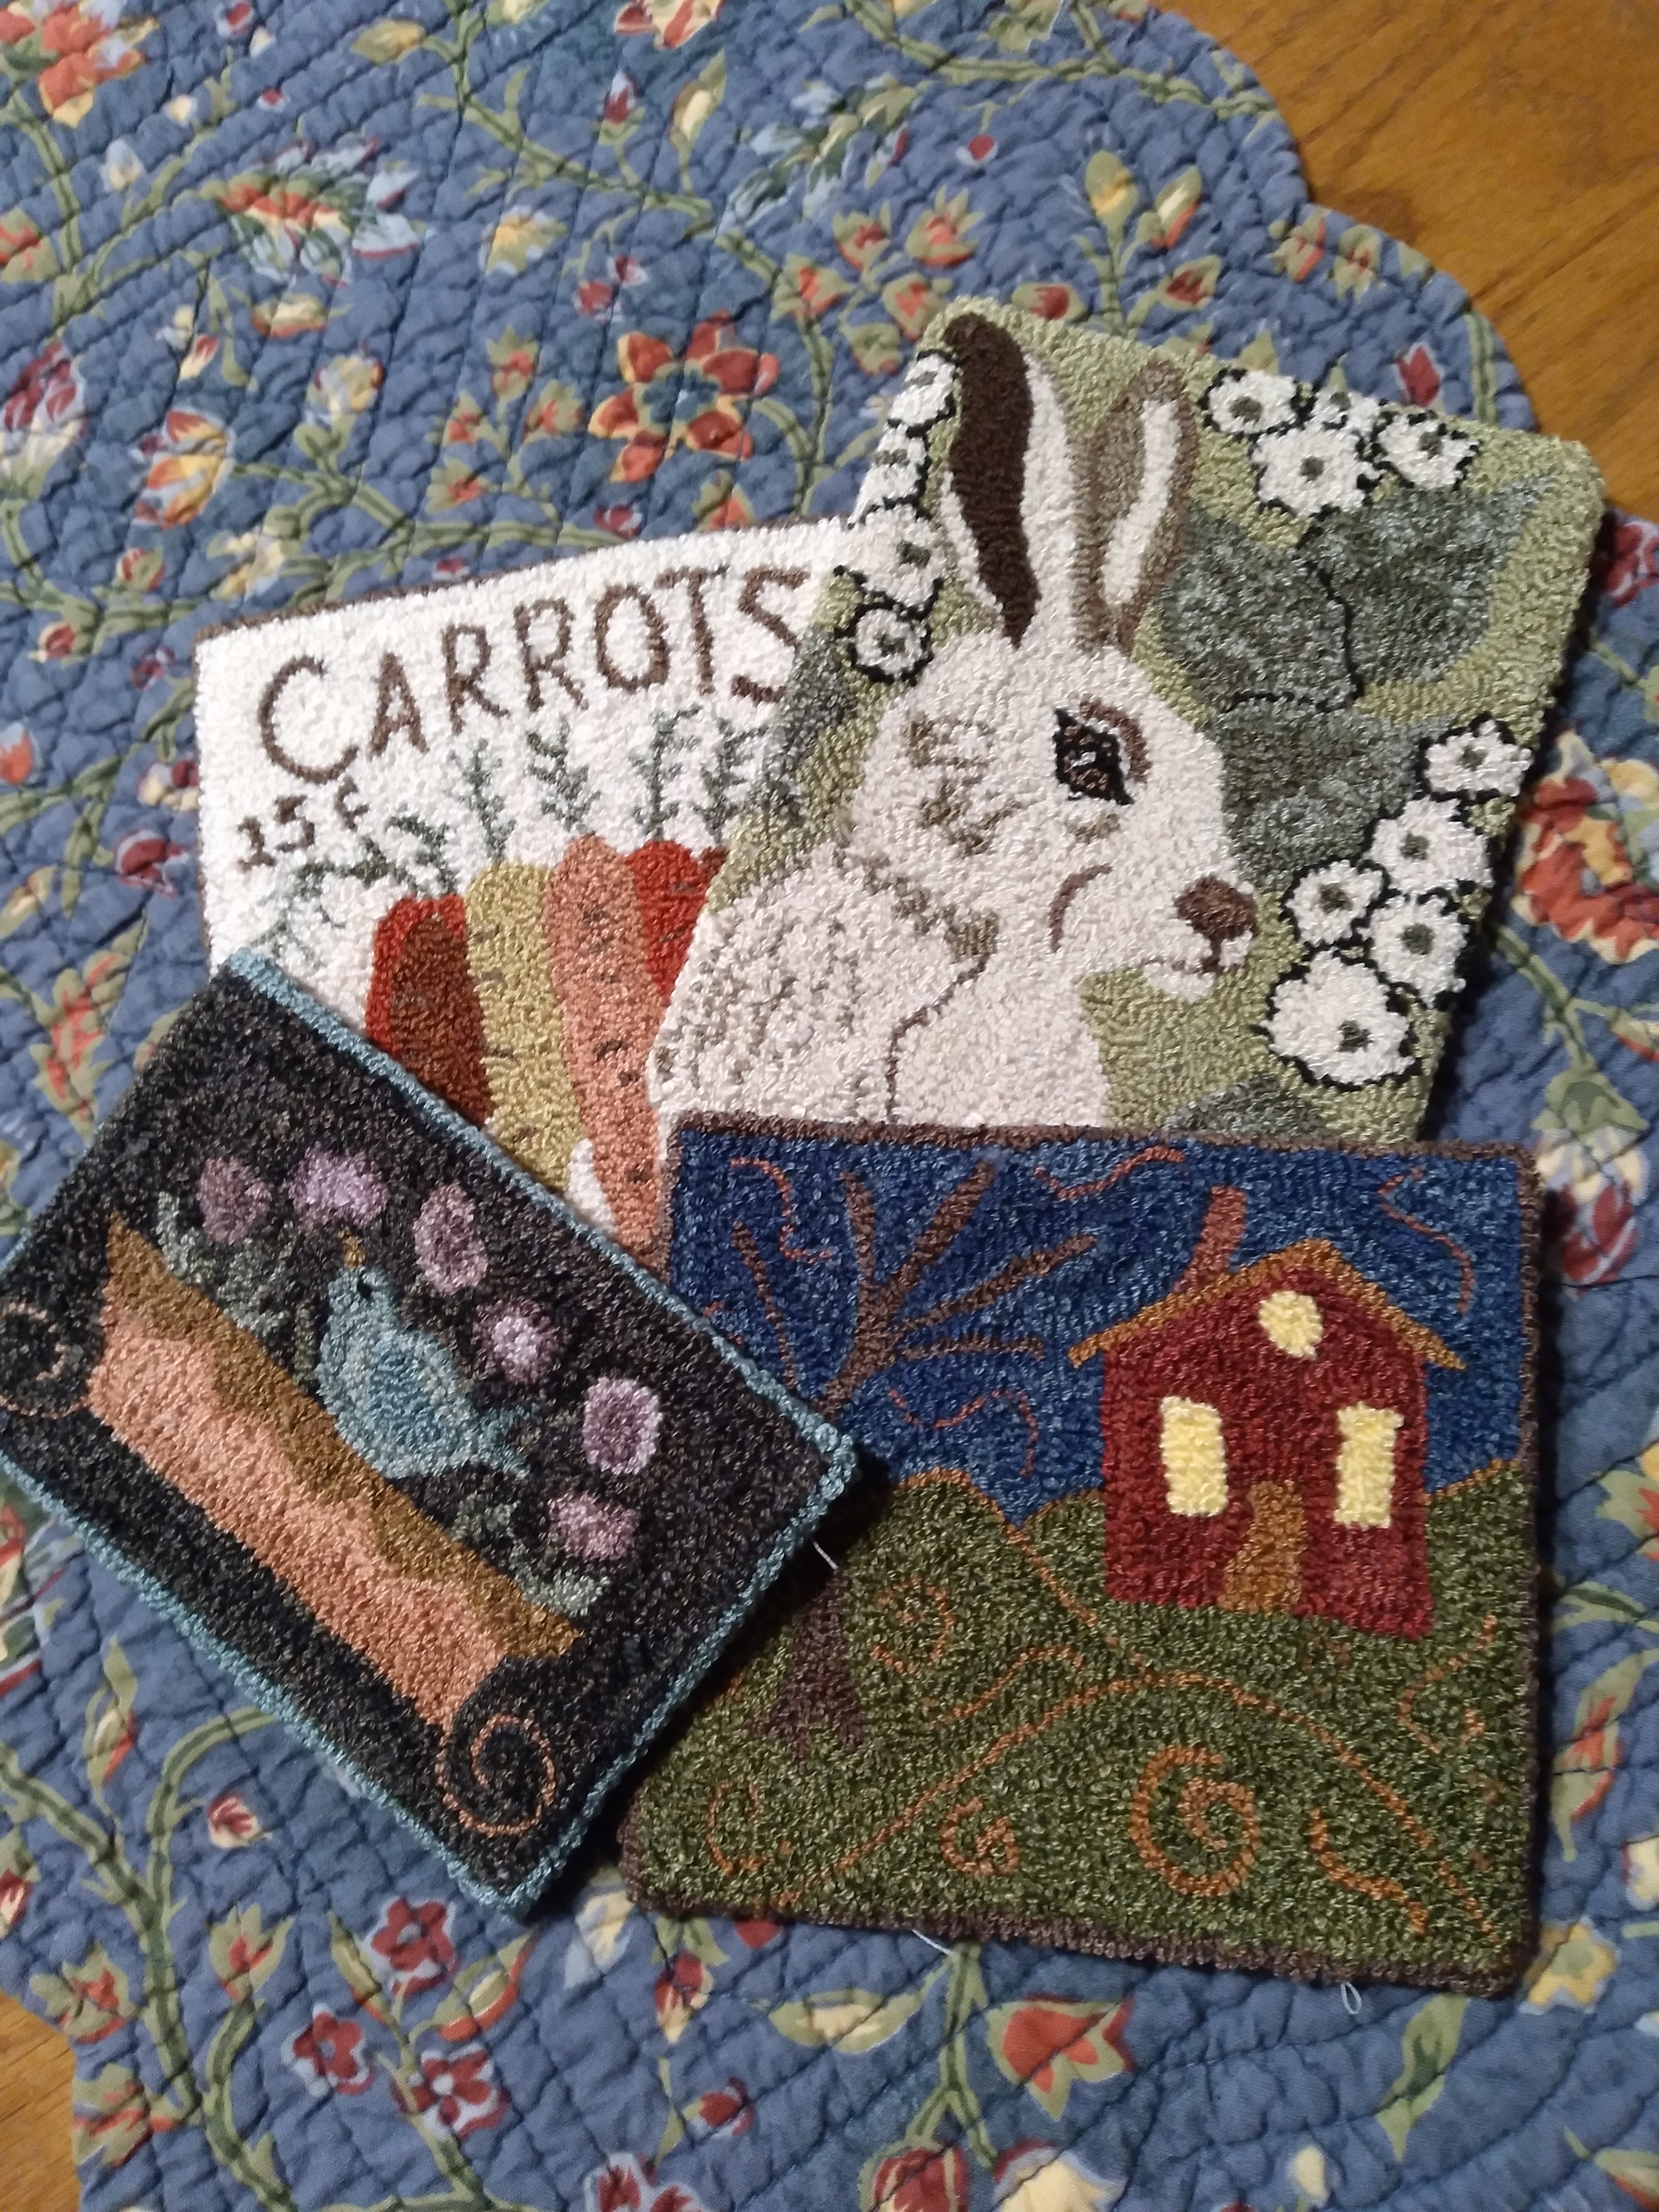
I have one picture to share. It shows some of the several pieces that are waiting for completion. The sunflower and saltbox piece will become a framed picture. I will have it at our drop-in meeting and demonstrate the process I use to frame punchneedle pieces.
The sunflower and saltboxes is from a freebie pattern from Lori Brechlin, Not Forgotten Farm. The sunflower and crows is from a past issue of Punch Needle Primitive Stitcher magazine, Julie Thomas, The Old Tattered Flag. Lady on Horse is a variation on an 1800s hooked rug.
Thanks for stopping by and thanks for your help in rebuilding my contact list. I hope to hear from you about our new Punchneedle Drop-in.
Greetings Punch Needle Friends. I hope you are well and not experiencing any extreme weather where you are. I’m looking forward to my third trip to Keweenaw this summer. This was not the original plan. However, on our first trip in May we were at our family home. We had only been there for two hours with the car parked in the driveway when someone had a medical issue and drove into our yard, our car and finally our garage door and door frame. The good news is that nobody was injured. Our car was taken to a repair shop. We couldn’t stay until it was repaired, so we returned home with a rental (after having the garage door replace and frame repaired. This trip is just under 600 miles. This was just before Memorial Day. Just before the Fourth of July the car was ready and we had to drive up to get it. Now, we’re awaiting our actual vacation in a few weeks. I couldn’t guess how many times I have traveled that route in my life, but I can tell you it will be six times in the space of 14 weeks this year. All this is to explain my absence from posting. The best laid plans….
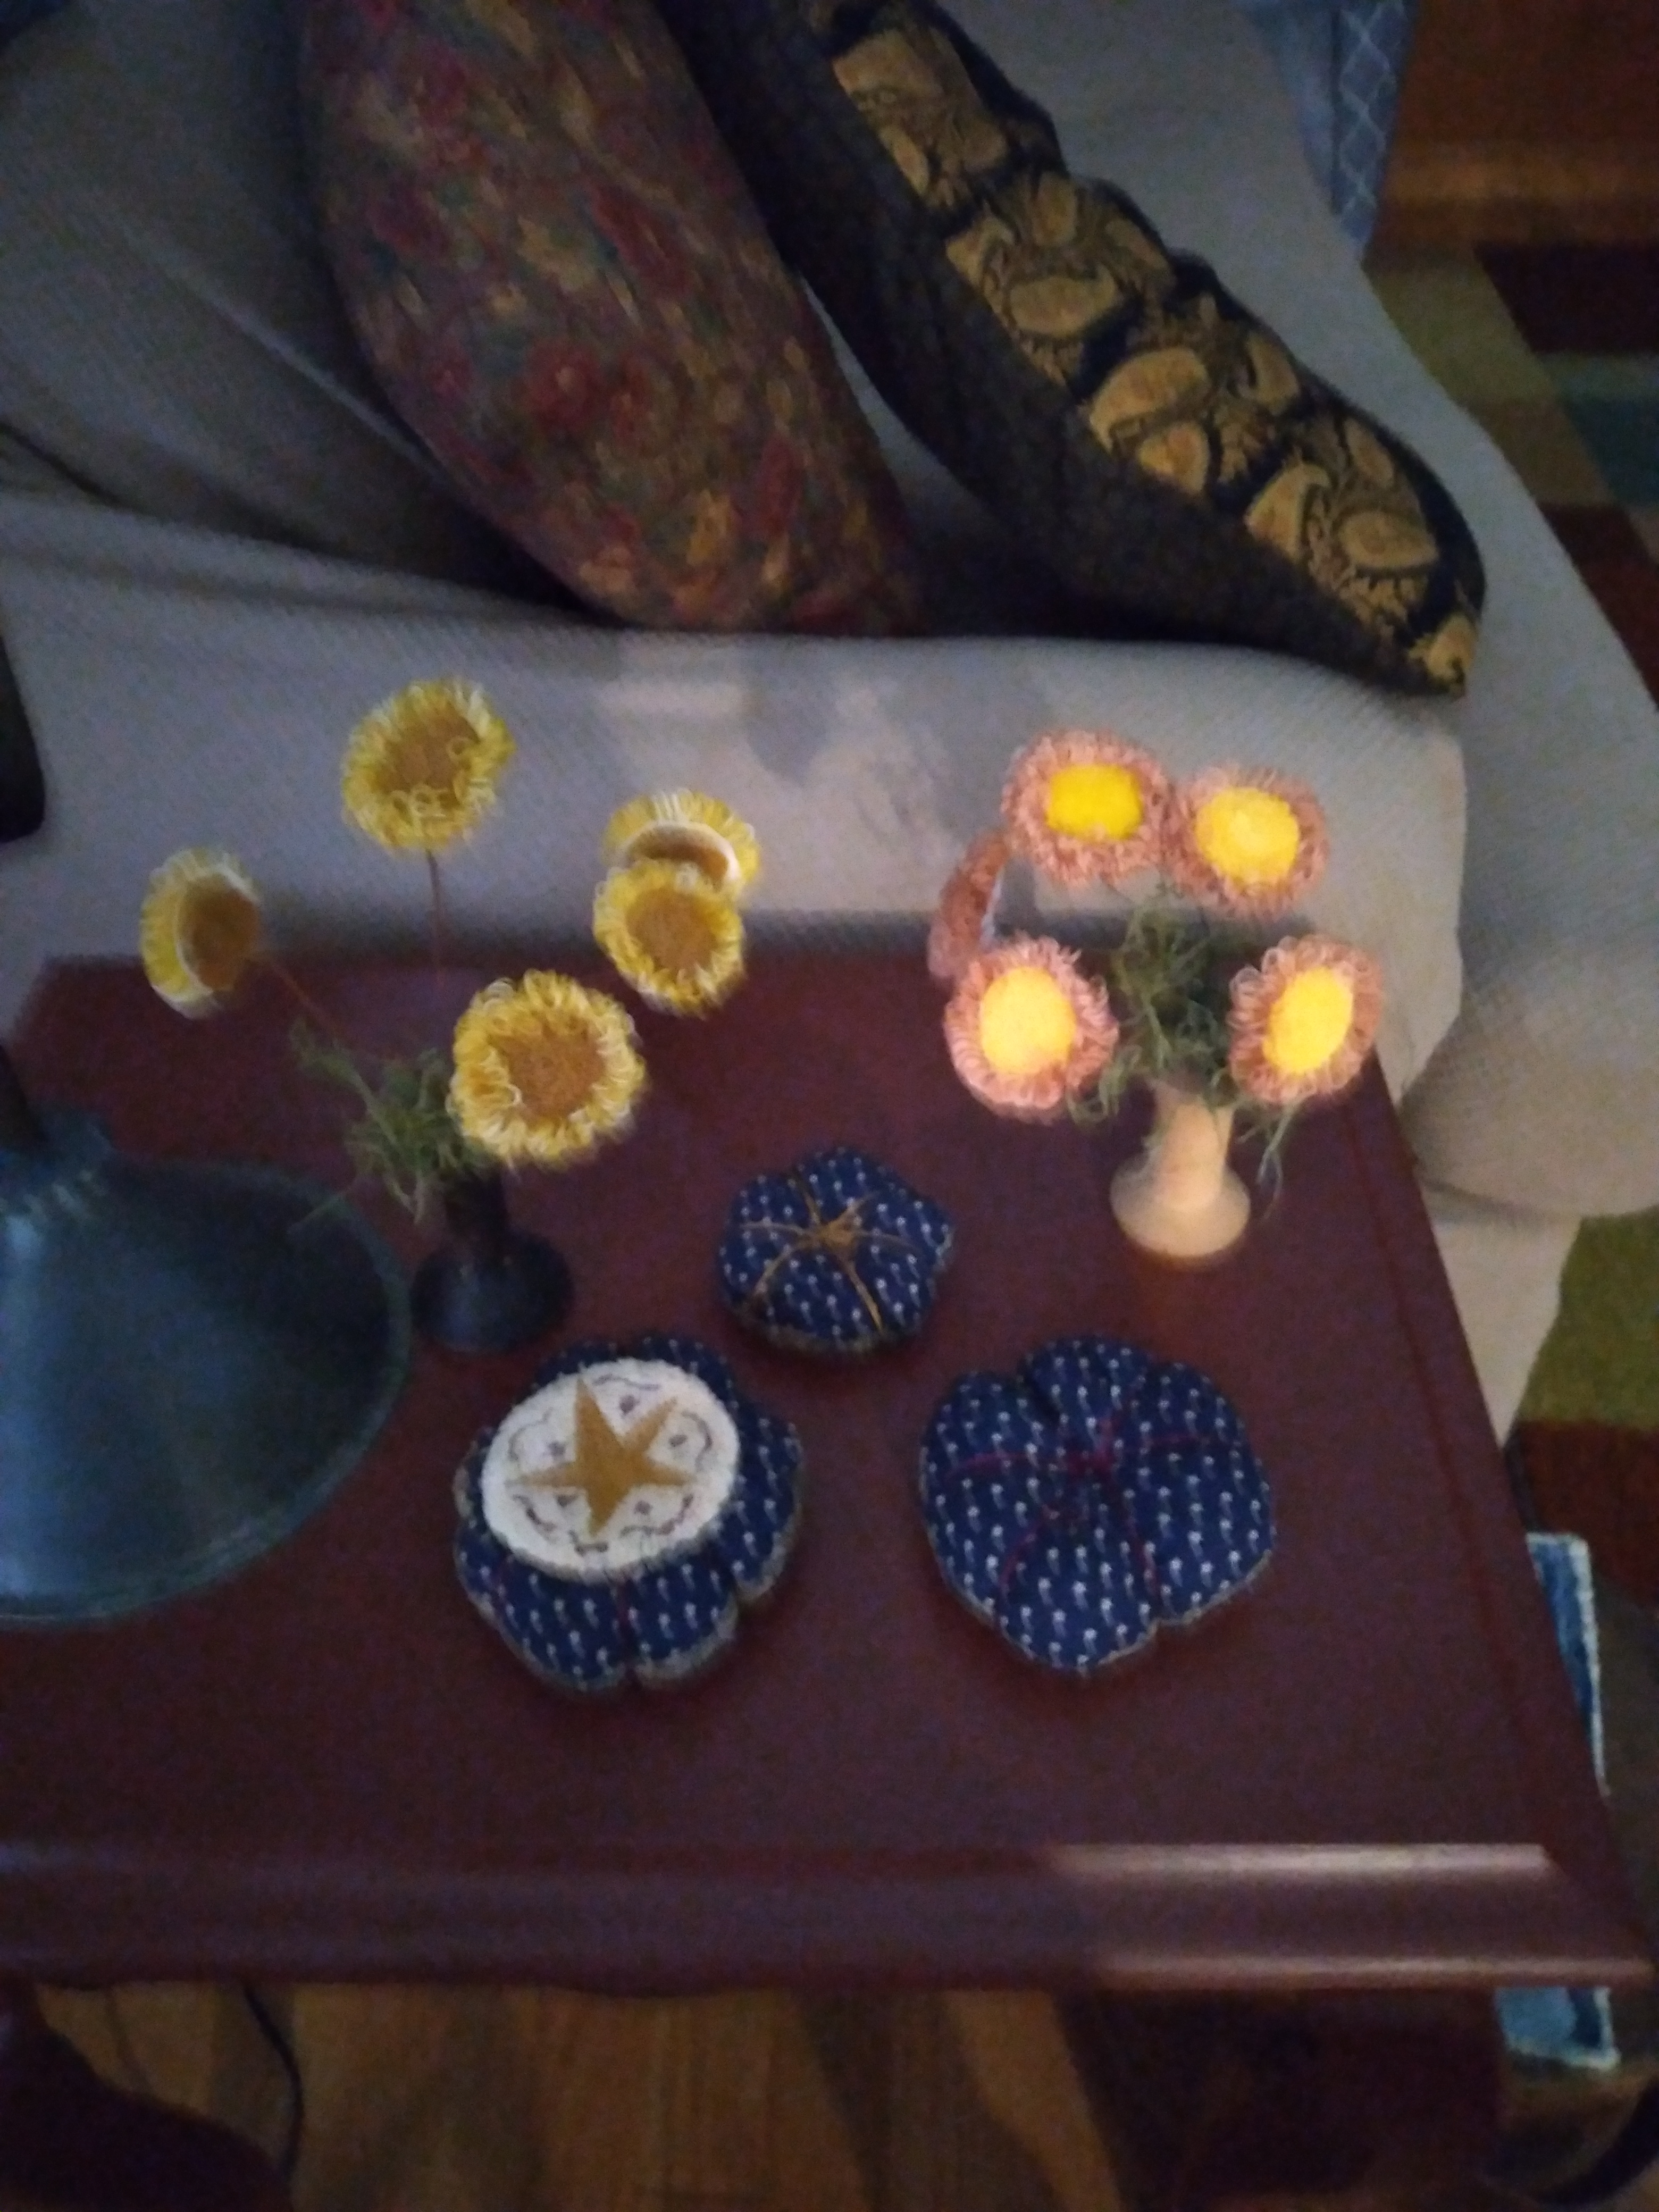
I want to share two easy projects. The first one is from Tara Guernsey, a clever and talented punch needle friend. Tara shared how she made little pin cushions with punched pieces sewed to the top.
The second project is from Julie Thomas from The Old Tattered Flag. Julie shared her little flower bouquets. Here is a picture.
Here’s how I did the pin cushions. I punched the little star. I sewed a back fabric to it with right sides together. Because the end result was to sew it to the cushion, I was able to sew completely around the circumference. Then I snipped a small slit to turn it right side out. I did the same thing with the contrasting fabrics used to make the cushion. When you snip the fabric to turn it right side out, make sure you snip the fabric you want on top. I used sand to fill the cushion and then sewed it shut. (On my first attempt I only used sand. With the other two I added a little fiber fill which made it easier to sew it shut.) Using DMC six strand floss begin by sewing from the top center of the cushion through to the bottom, wrap the floss around the outside of the cushion and insert the needle in the same spot and bring the floss around across the from the first loop. Do this three times, tugging it a little tightly to create the affect you see in the picture. Tie it off and then sew the punched piece to the top. Use your imagination to create your punched piece.
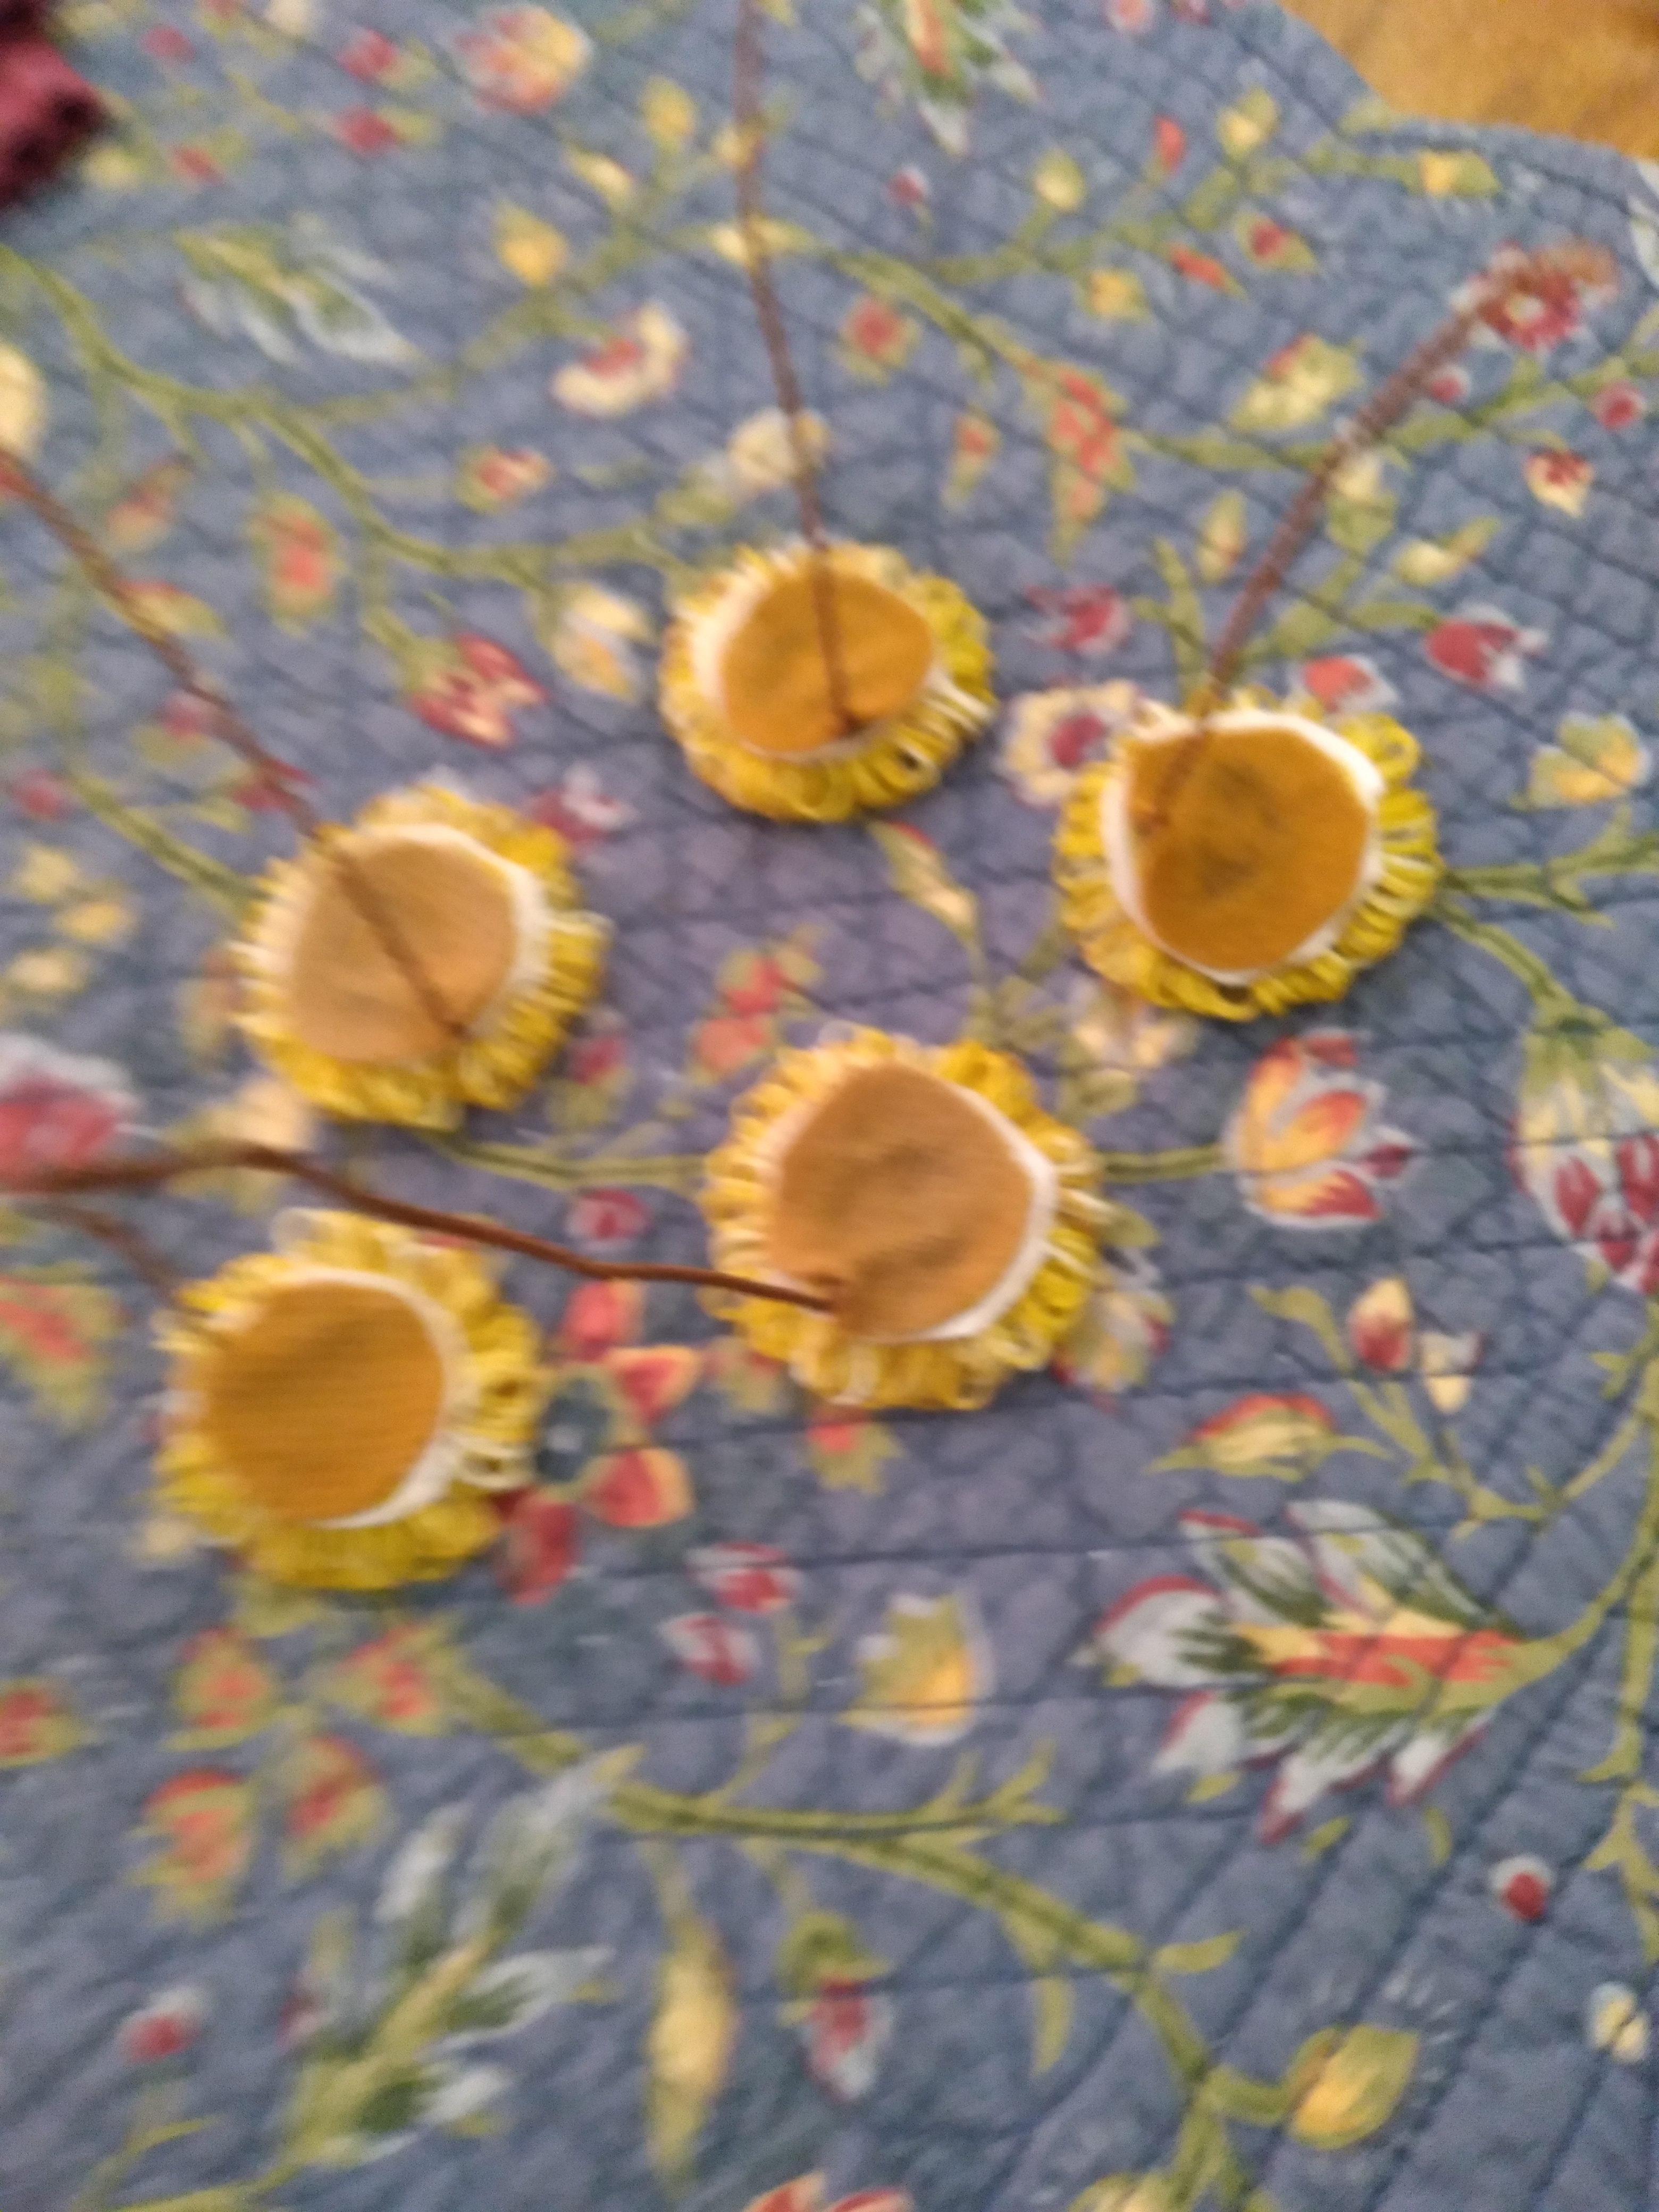
Now, Julie’s flowers. Draw your circles. I did the yellow centered flowers first with a 1 1/4 inch diameter. The gold centered ones I just did a one inch diameter. Punch with your needle set to #2 depth. Then with a contrasting color floss punch 2-3 times around the center with your needle set to #12 depth. Pretty simple, right? On my first attempt I cut the weavers cloth about a half inch outside the flower then folded and glued it to the flower back. I used floral wire and glued it to the back with a small circle of weavers cloth to hide the wire. They look ok, but just ok. When I did the second set I remembered a technique someone else uses. While the flowers were still on the weavers cloth I applied glue to the circumference of each one. When it dried I just cut the cloth away right at the edge of the flower. On these I also used wool to make the covering circle and also used my rusty wire. With both wires I twisted one end into a circle smaller than the flower, bent the wire straight up from the circle and glued it on.
I found a couple wooden spools in my menagerie of collected ‘stuff’ to mount them. I used duct tape to cover the bottom ends of the wire and put a little fiber fill into the spools to keep the flowers stable and then added a little moss.
So, there you go! A couple little summer projects. Thank you Tara and Julie!
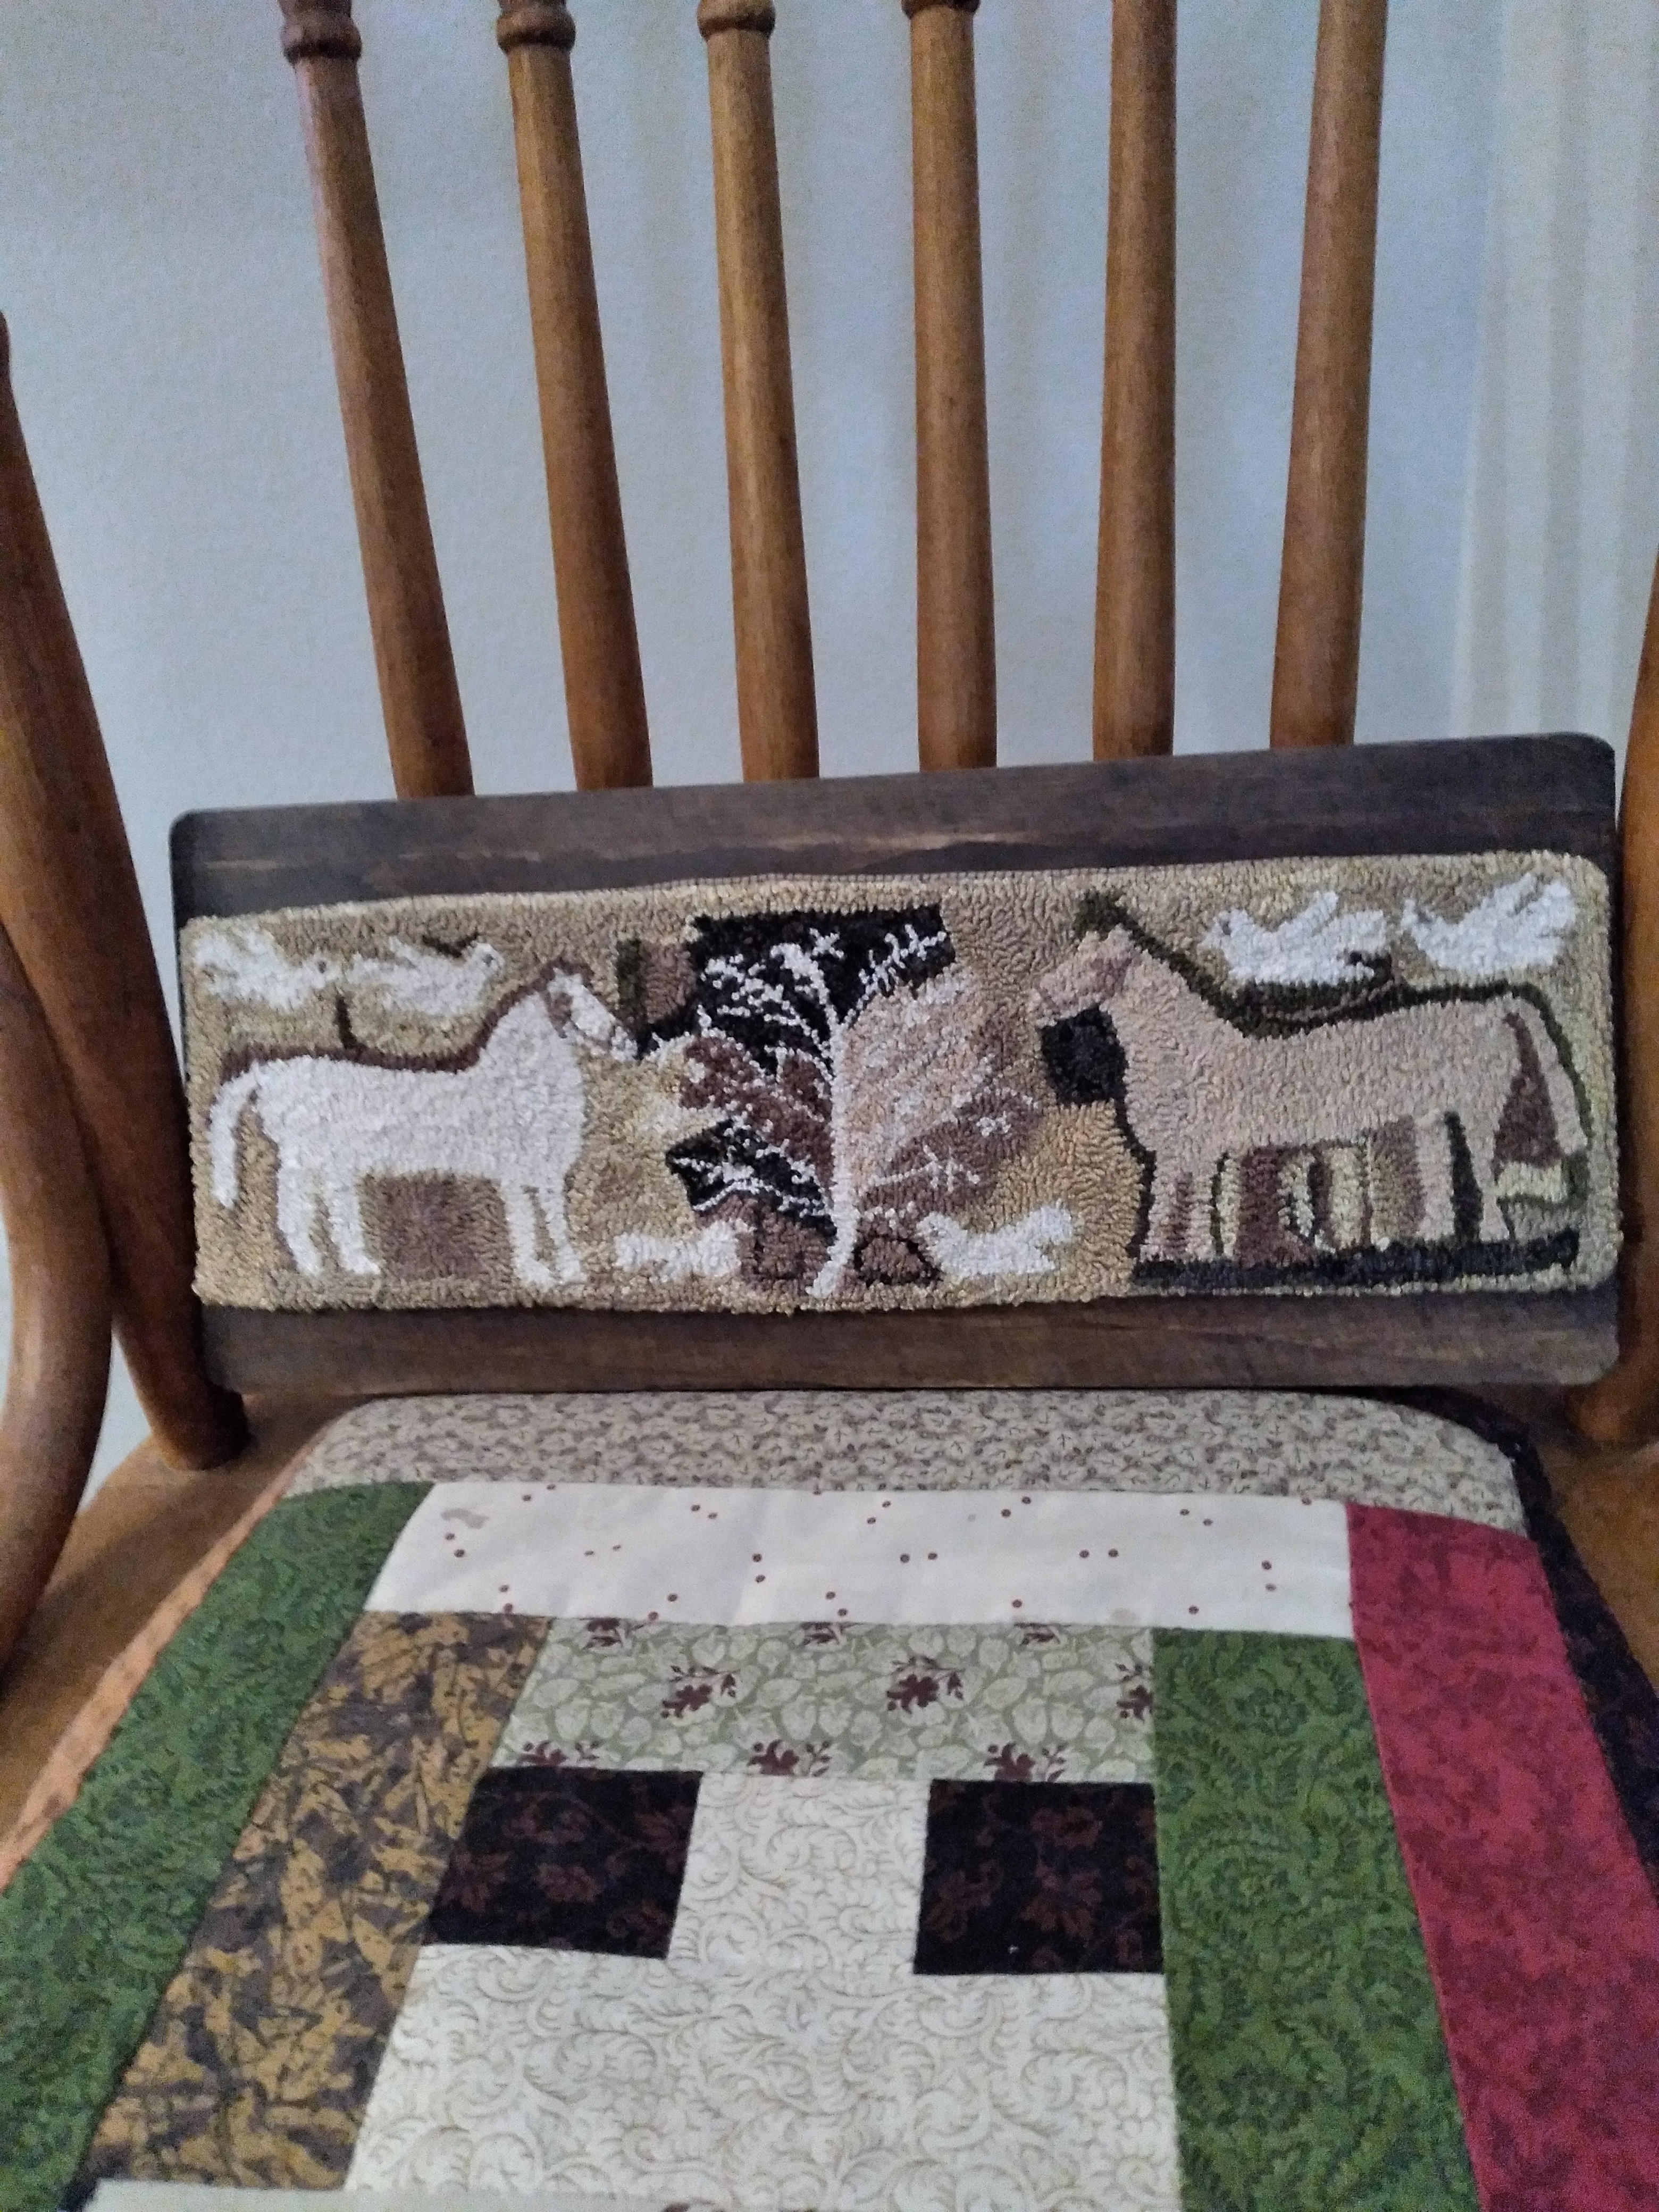
Days have been busy here at Yooper Trails preparing for the show tomorrow in Holly. I’ve enlisted our good friend Jeff in making hornbooks and by husband Bruce in painting them. I do a limited number of shows each year and it’s always exciting getting ready for them. This is being hosted by Cari Cucksey (Cash and Cari) and the Holly Vault Collection. The address is 111 College Street, Holly MI. The time is 10AM until 5PM and admission is $5. Hope to see you. Here are a few pieces I’ll have there.
Greetings to my Irish friends and all those who are Irish today. Back home in Yooper country this was the day anticipated that last big winter storm of the season. I understand there is a potential of 8 to 26 inches of snowfall across the Upper Peninsula over the weekend. It’s a good thing they know how to manage that much snow.
Days have been busy here as I prepare for the Vintage, Antique and Handmade Show on April 1 sponsored by Cari Cucksey fron the Holly Vault. 111 College St. Holly, MI . The hours are 10am until 5pm and admission is $5.
If you have been following my posts you know the story of my search for my rocking bowl wedge. Happily it has been found and has become the base for Yankee Doodle to come to town riding on his pony. This is my design and it is the second one I’ve done. (No more old bowls laying around the house, so I might not do another.
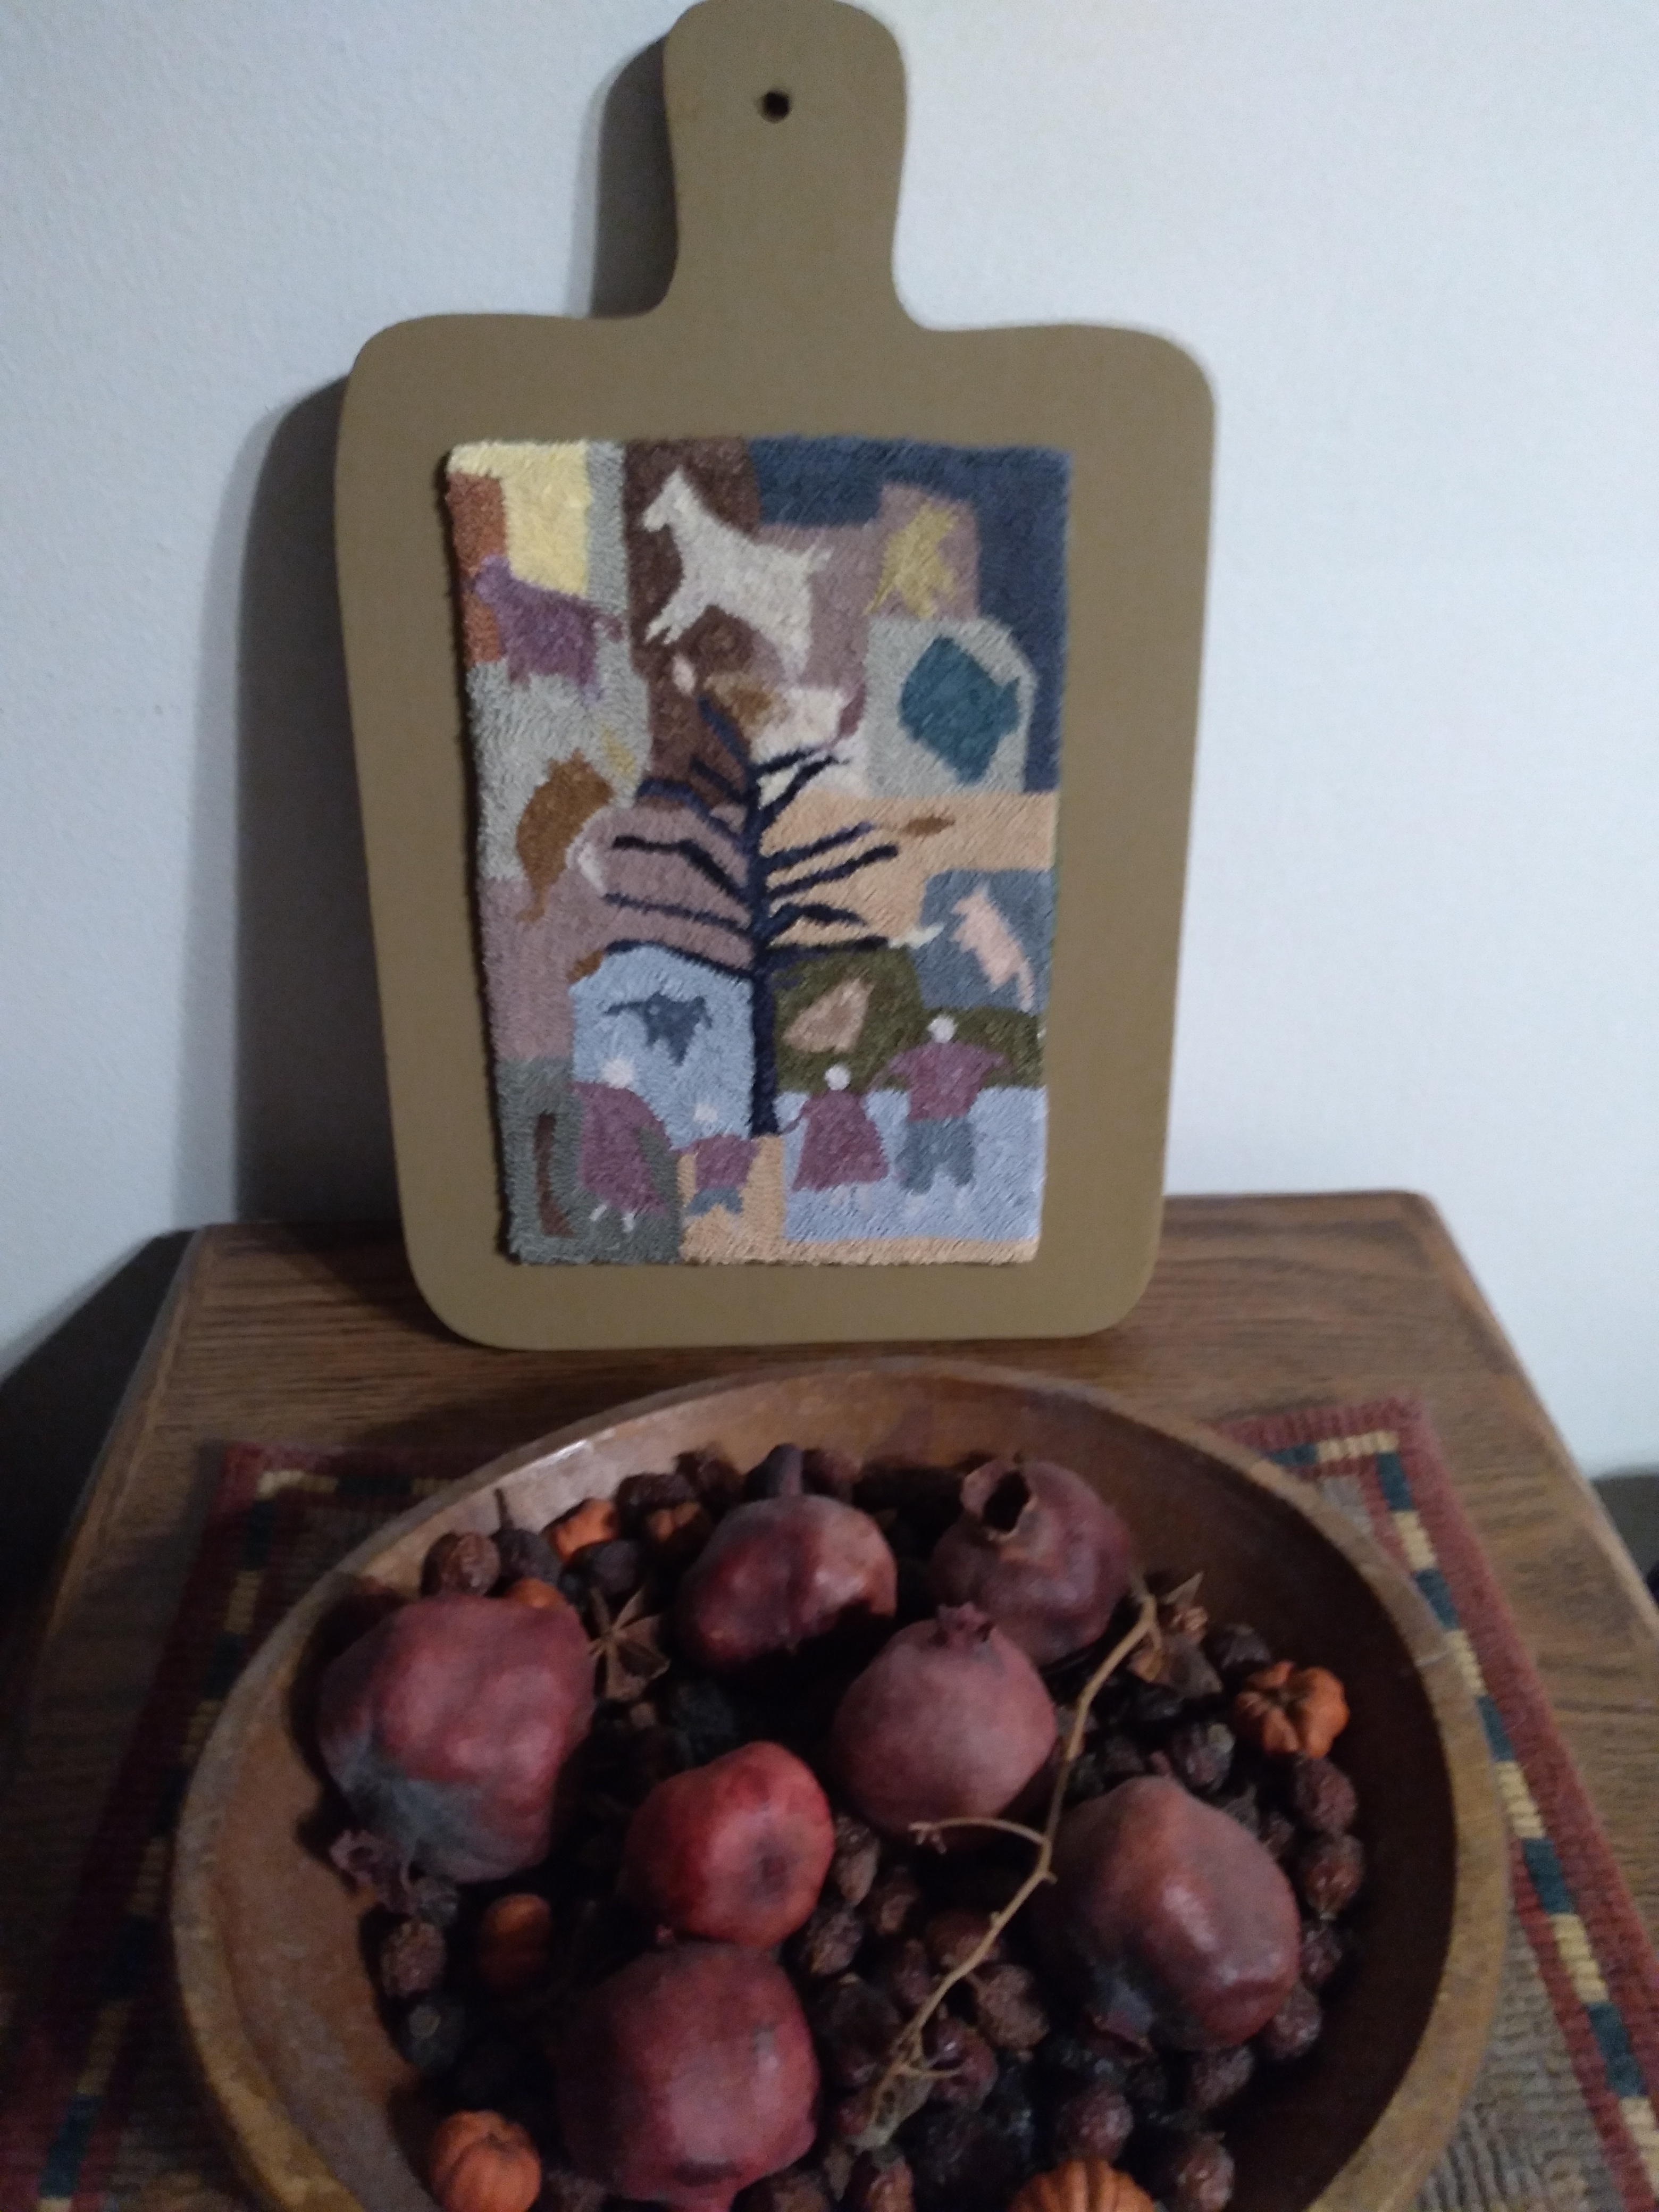
This next piece is a reproduction of a hooked rug done by Madgalena Briner Eby, who was a prolific rug hooker from the 1800s. I do a lot of prims because I love the style. This particular project was a bit challenging. (Tip for you punchers out there, don’t cut those tails immediately because it’s easier to push them to the side as you fill in the spaces. Punching around all those tails on the tree is a slow process as you don’t want to leave any blank spaces. I ran out of some colors but then thought, back in the 1800s women didn’t run to the store for more supplies. They mostly used scraps to begin with. So, I did the same. I mounted it on a stained plaque. I’m adding a picture of the back to show how it will hang. I glued two buttons and will tie waxed jewelry string to provide a hanger. (I didn’t want to wait for the glue to dry to post pics.)
That’s it for today. Hopefully in a few days I’ll have my Family Tree, pattern from Rebecca Lindquist at The Simple Quiet and my bunny and tulips sitting in a Kraft cheese box, freebie pattern from Colleen King Collaizzi . Thanks for stopping by.
My piece is almost complete. I still need to sew the bottom closed, but I couldn’t wait to post a picture. I was really pleased at how easy the arm sewed up. I used my sewing machine to stitch most of it and then inverted it and hand sewed the remainder using just a a bit of fiberfill. One thing that helped was using homespun cotton for the backing. Homespun has a little more give than regular cotton fabric. Whenever I make stuffed pieces I use the least stuffing that is necessary to give it dimension. I don’t like tightly stuffed items. Again, thanks to Rebecca from The Simple Quiet for this pattern.
What a great idea and efficient plan. Unfortunately not one I have developed over the years. I fall more under the “Where did I put that (fill in the blank) My mother always said to look in the closest spot. That sometimes helps, by the way.
So, all this really does fit into a punch needle story. I even have a few pictures of WOPs. Let me continue with my story. I’m preparing for a show in Holly. MI on April 1 (Vintage, Antiques, Primitives and Handmade Goods Show) I”ve been working on some ‘smalls’ available and discovered a great method of presenting them. I sew on rusty wire to create a hanger. I gives it an aged look, which I like and it also keeps the piece from sagging when you hang it.
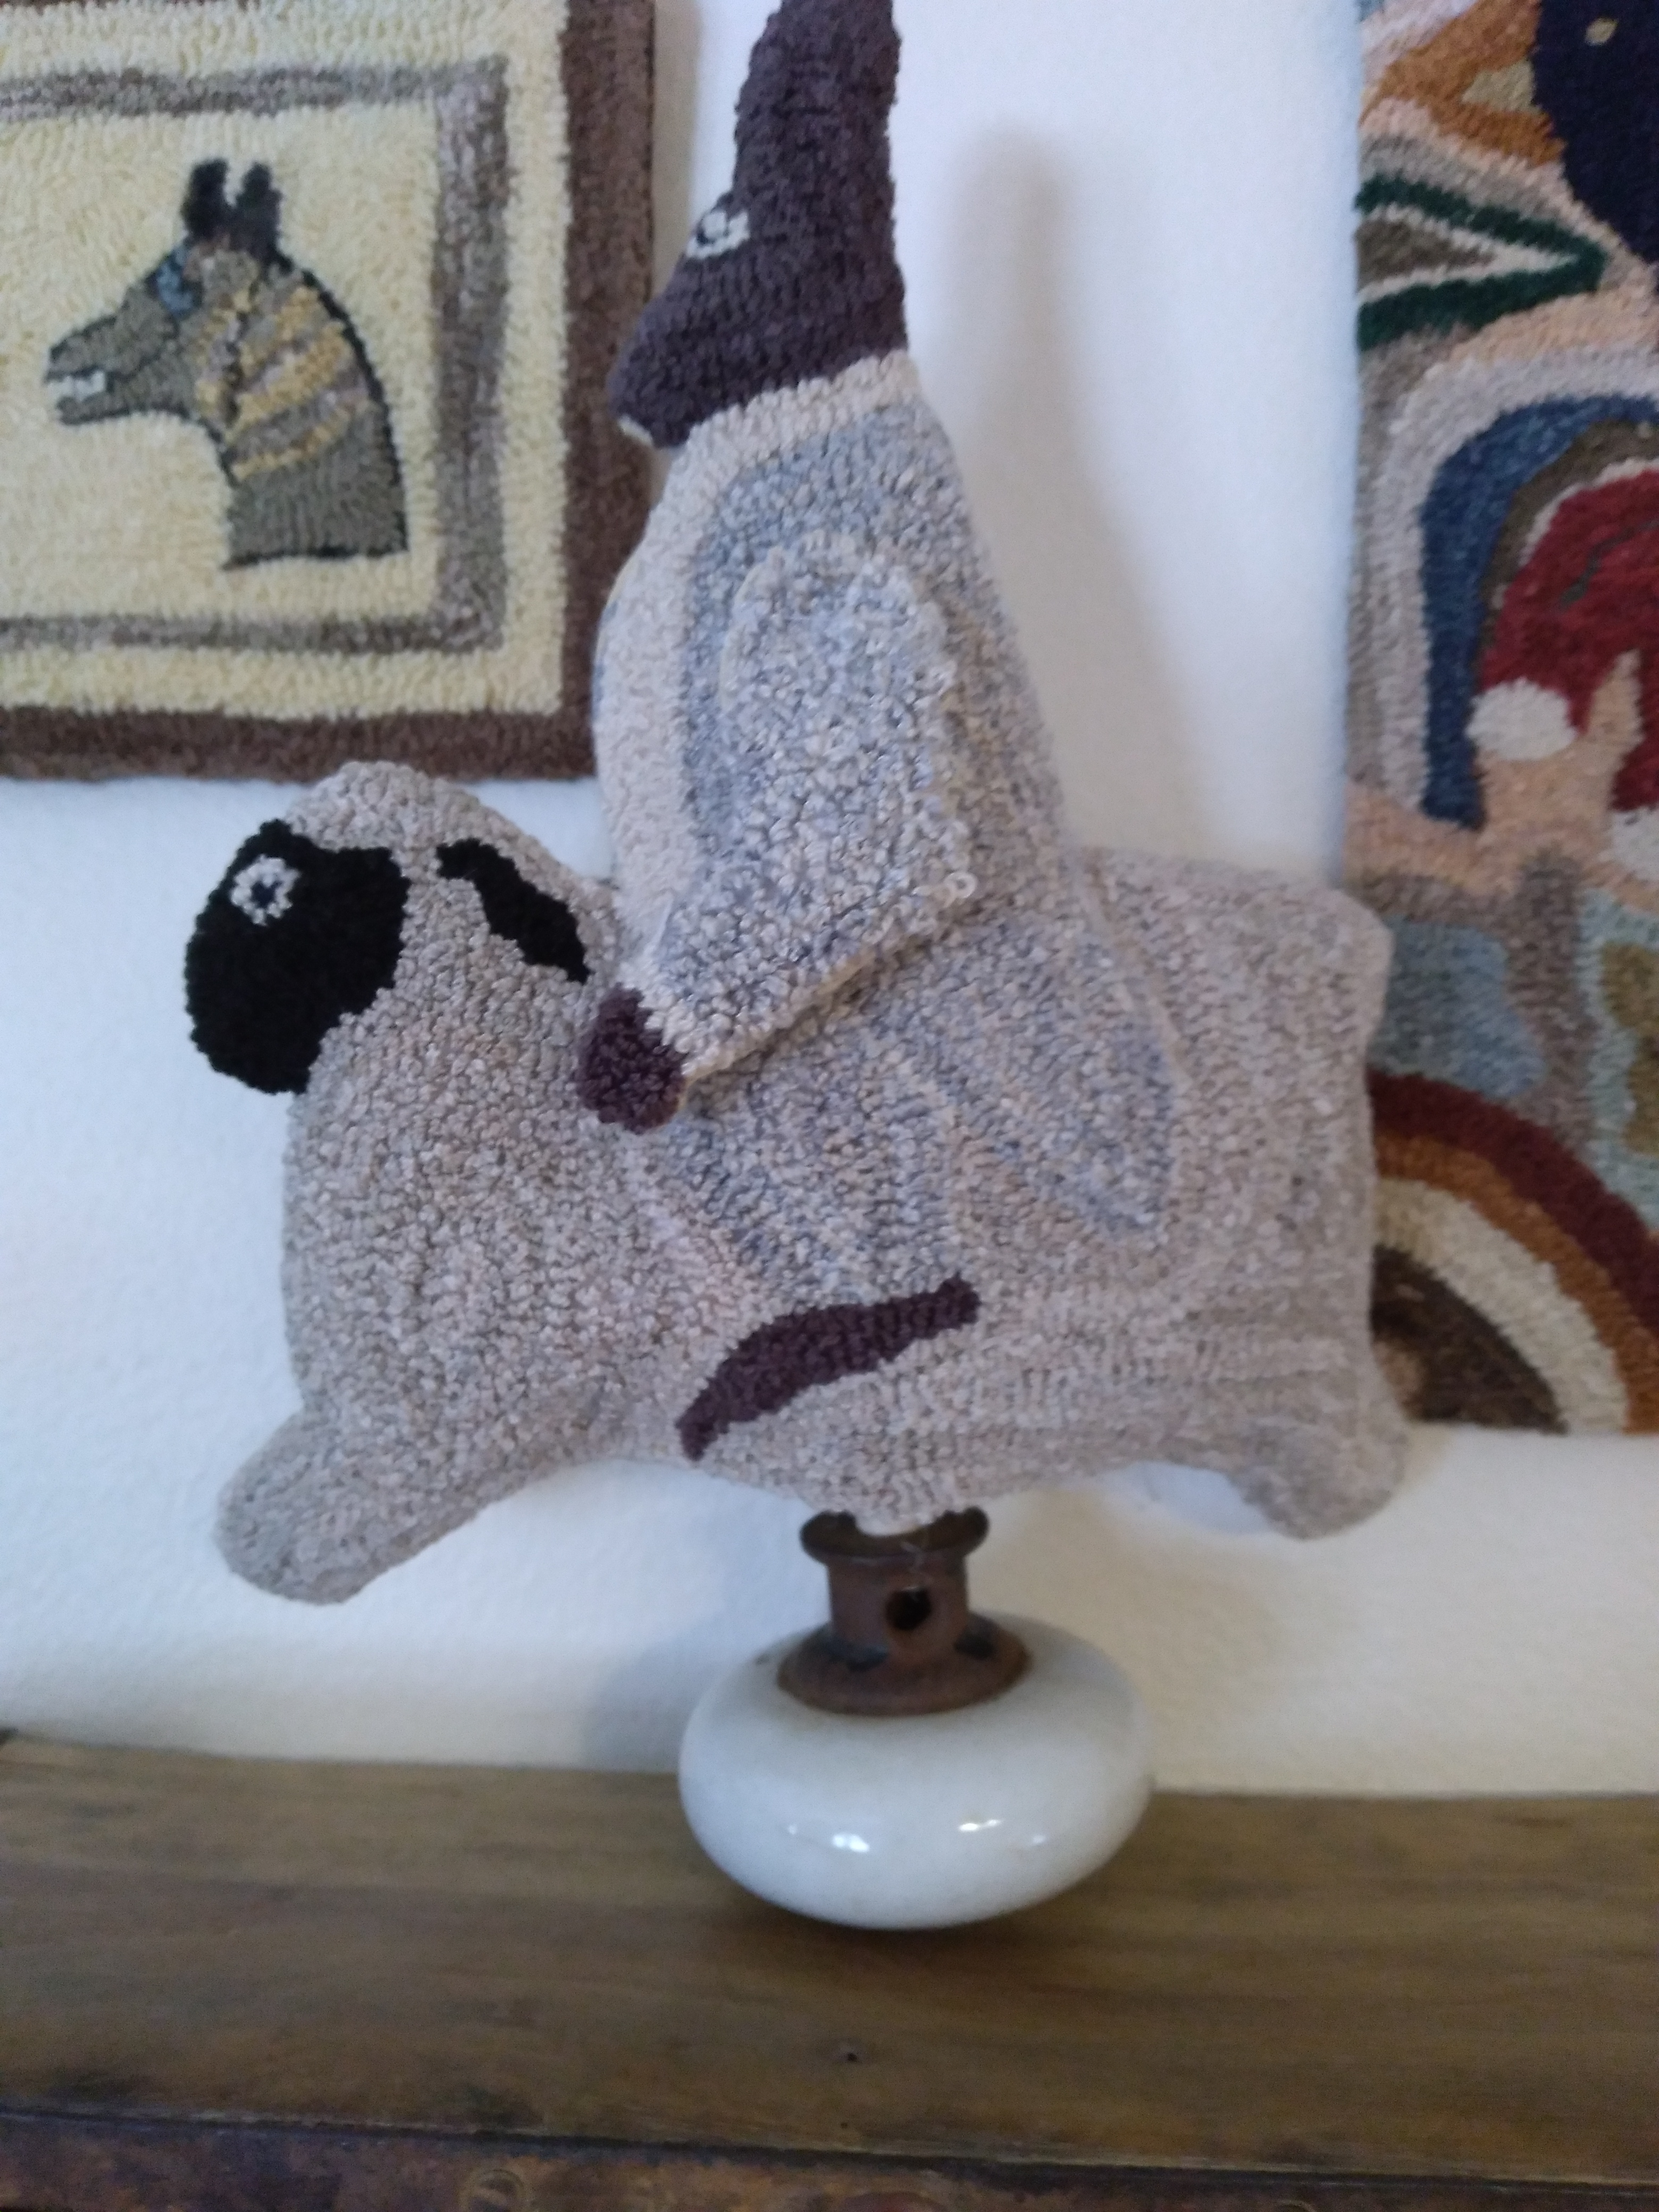
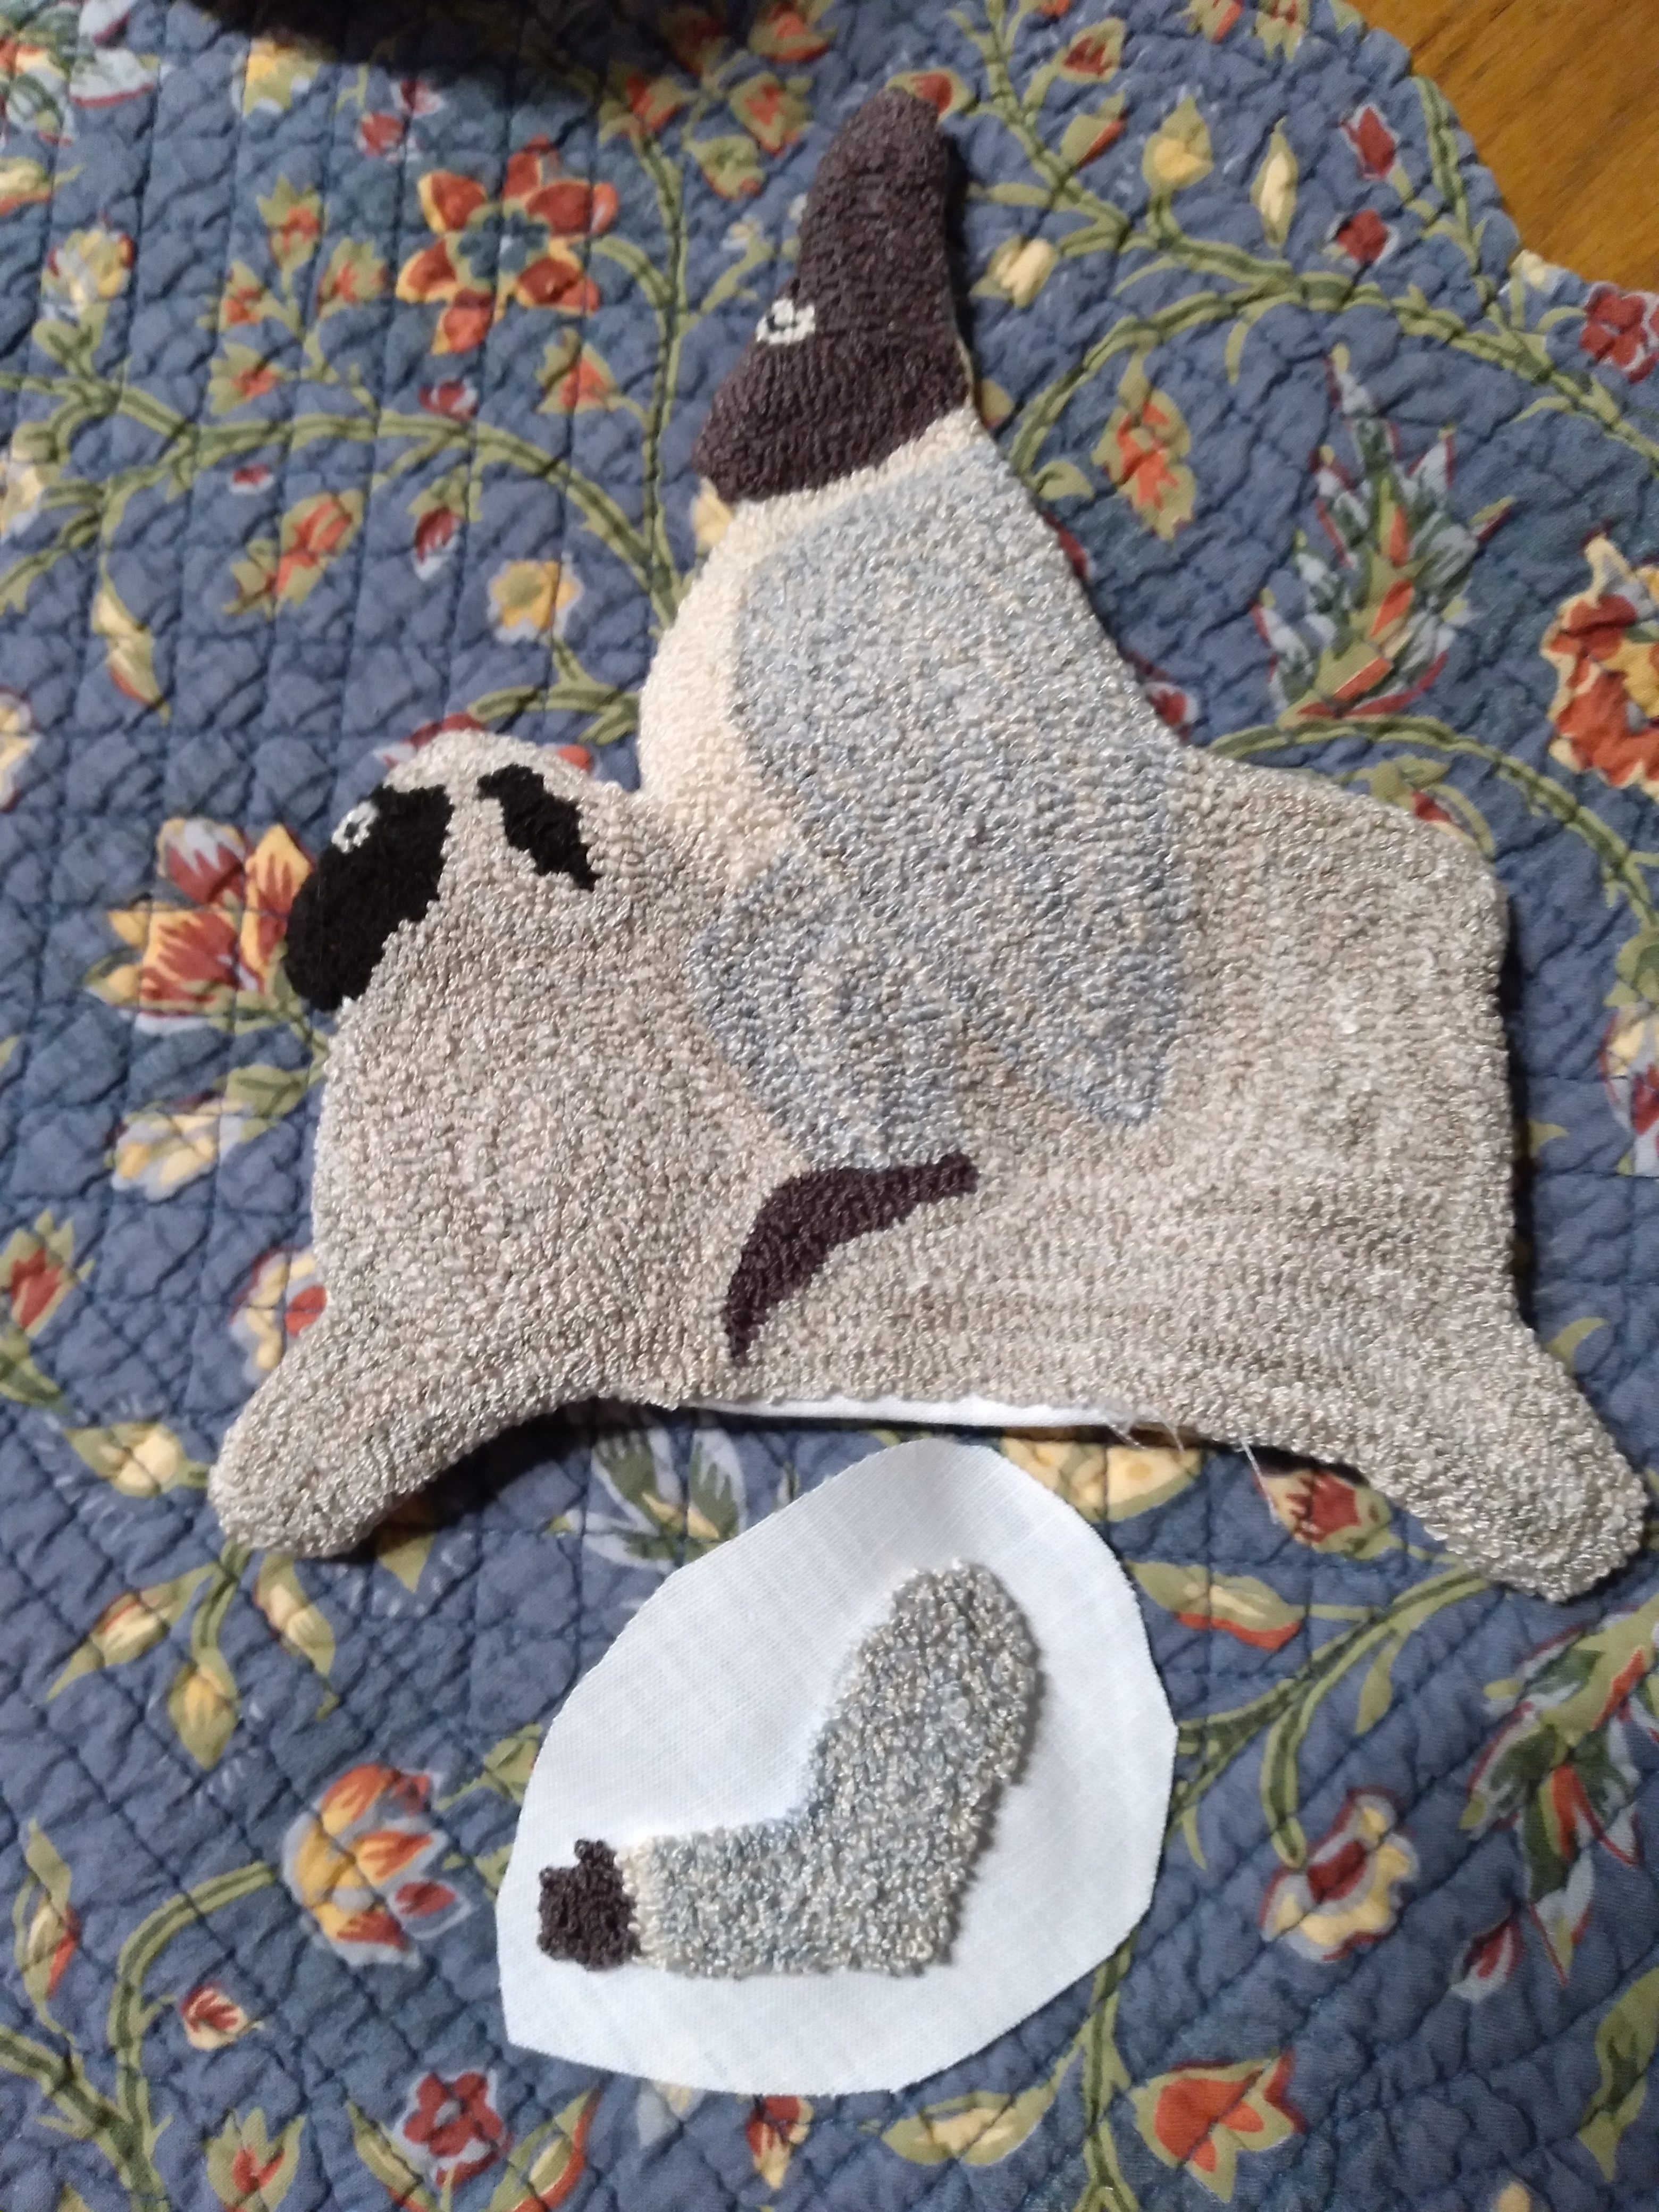
Along with my smalls, I decided to replicate a piece I did from Rebecca Lindquist. Rebecca is my punch needle hero/guru/inspiration. Years ago I punched a rabbit riding a sheep and mounted it on a wedge/rocker I cut from an old wooden bowl. I had a second wedge from the same bowl, which I’ve seen in my house regularly through the years.
As this story is getting long, let me summarize. I looked ‘everywhere’ for the wire, finally gave up and ordered some more. I moved on to finding the rocker wedge. After two days I decided to use a white doorknob instead to mount my make-do rabbit/sheep piece. Since then, the bowl rocker simply appeared on my workbench and the next day the wire appeared right on my desk in the middle of our living room! Can you say gremlins?
Here are a few sneak previews of current projects. All four of the smalls came from Punch Needle Primitive Stitcher magazines. All I have to do is sew on the wire hangers. The second picture is the make-do piece of the rabbit and sheep. Sewing a back on the arm is challenging. I might hand sew it or else machine sew 60% and then invert and hand sew the rest. Along with my where did I put game, I’m finding little ‘updates/changes to the format on my website, causing me to take three days to get this short post ready. So, wish me luck and I should return with some finished projects by midweek. Enjoy your Sunday.