There are many ways to finish a NP project. And there is more than one way to do framing. Today I want to share with you my method of framing. You need: quilt batt, foam board, double-sided acid free tape, point driver, brown wrapping paper, regular Scotch double-sided tape and something to hang it with. I usually use screw eyes and waxed jewelry cord. (I like the feel of it) I have used the saw-toothed hangers also. So, here we go…


Cut the foam board to the larger measurement (first picture) When I have my piece on a hoop for punching I center the frame on top of it and draw the inside perimeter around the PN. I usually do one last check when I have completed the punching. Sometimes you need to add a few more punches in some places.
Glue the batt to the foam board. (Trim the edges to fit the foam board) This gives the finished piece a little body and makes it pop slightly from the frame. I use Tacky glue. Let it sit until the glue dries completely. Place the acid-free tape around the back edges of the foam board, leaving the paper on the top side. Center your PN over the batt , checking the front side of the frame.. This usually takes me several attempts. You want to get the placement exact so there is no weavers cloth showing around the edges. Now you peel off the paper from the tape and lightly tape weavers cloth to the tape. Check the front again. If you aren’t satisfied you can gently peel the weavers cloth from the tape. When you are happy with the placement you want to firmly/gently stretch all the weavers cloth to the tape, pressing as far into the corners as you can.


As you see, you can get little ‘ears’ sticking up in the corners. When I use the point driver to staple the foam into the frame I fold down the ears. If you don’t have a point driver, you can use tiny nails or brads to hold the piece in the frame.( I finally decided it was worth the $50 to me to get the tool since I was doing a lot of framing, which I found at Blicks, an art supply store.)
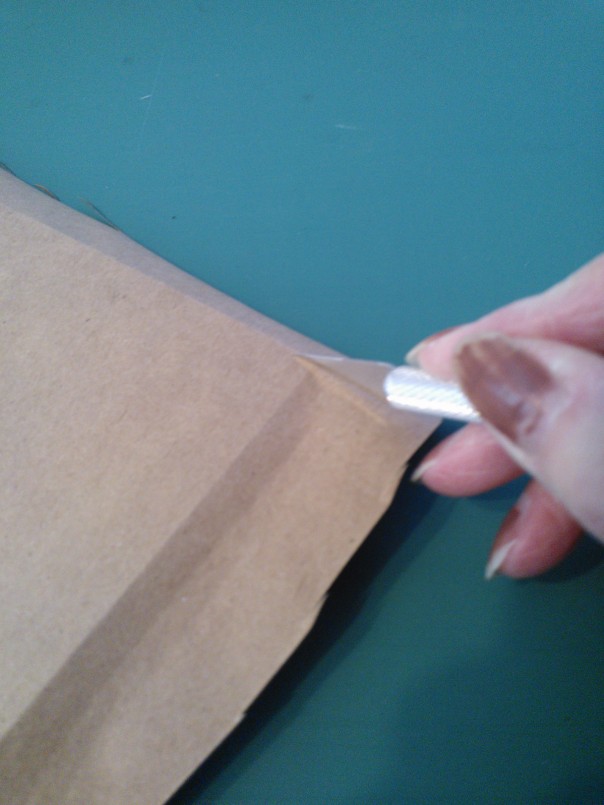
Next, I use Scotch double-sided tape around the edges of the frame and press brown paper onto the back. Using a blade, carefully cut about a quarter inch on both edges of each corner. Then align with a ruler and cut (carefully) along each side. The little pre-cuts help to remove the excess paper without tearing the finished edges.


Place the screw eyes 1/3 of the distance down from the top. Use a light touch when screwing them in because they can break off. I will start the hole with a hand drill first. Add the jewelry cord, sign and date your work (always giving credit to the pattern creator) and you are set to go.

So, when I post things I am editing and re-editing my entries for typos or phrases I’m not thrilled with, This one was relatively easy. But when I went back after hitting the publish key, I see that my nail polish job is sure no endorsement for the local nail salon. Oh well….
LikeLike